1) Quick Access Top Menu Bar
In the quick access top menu bar you can find frequently used functionalities, as well as the battery status of the Operators' HoloLens and the current time.
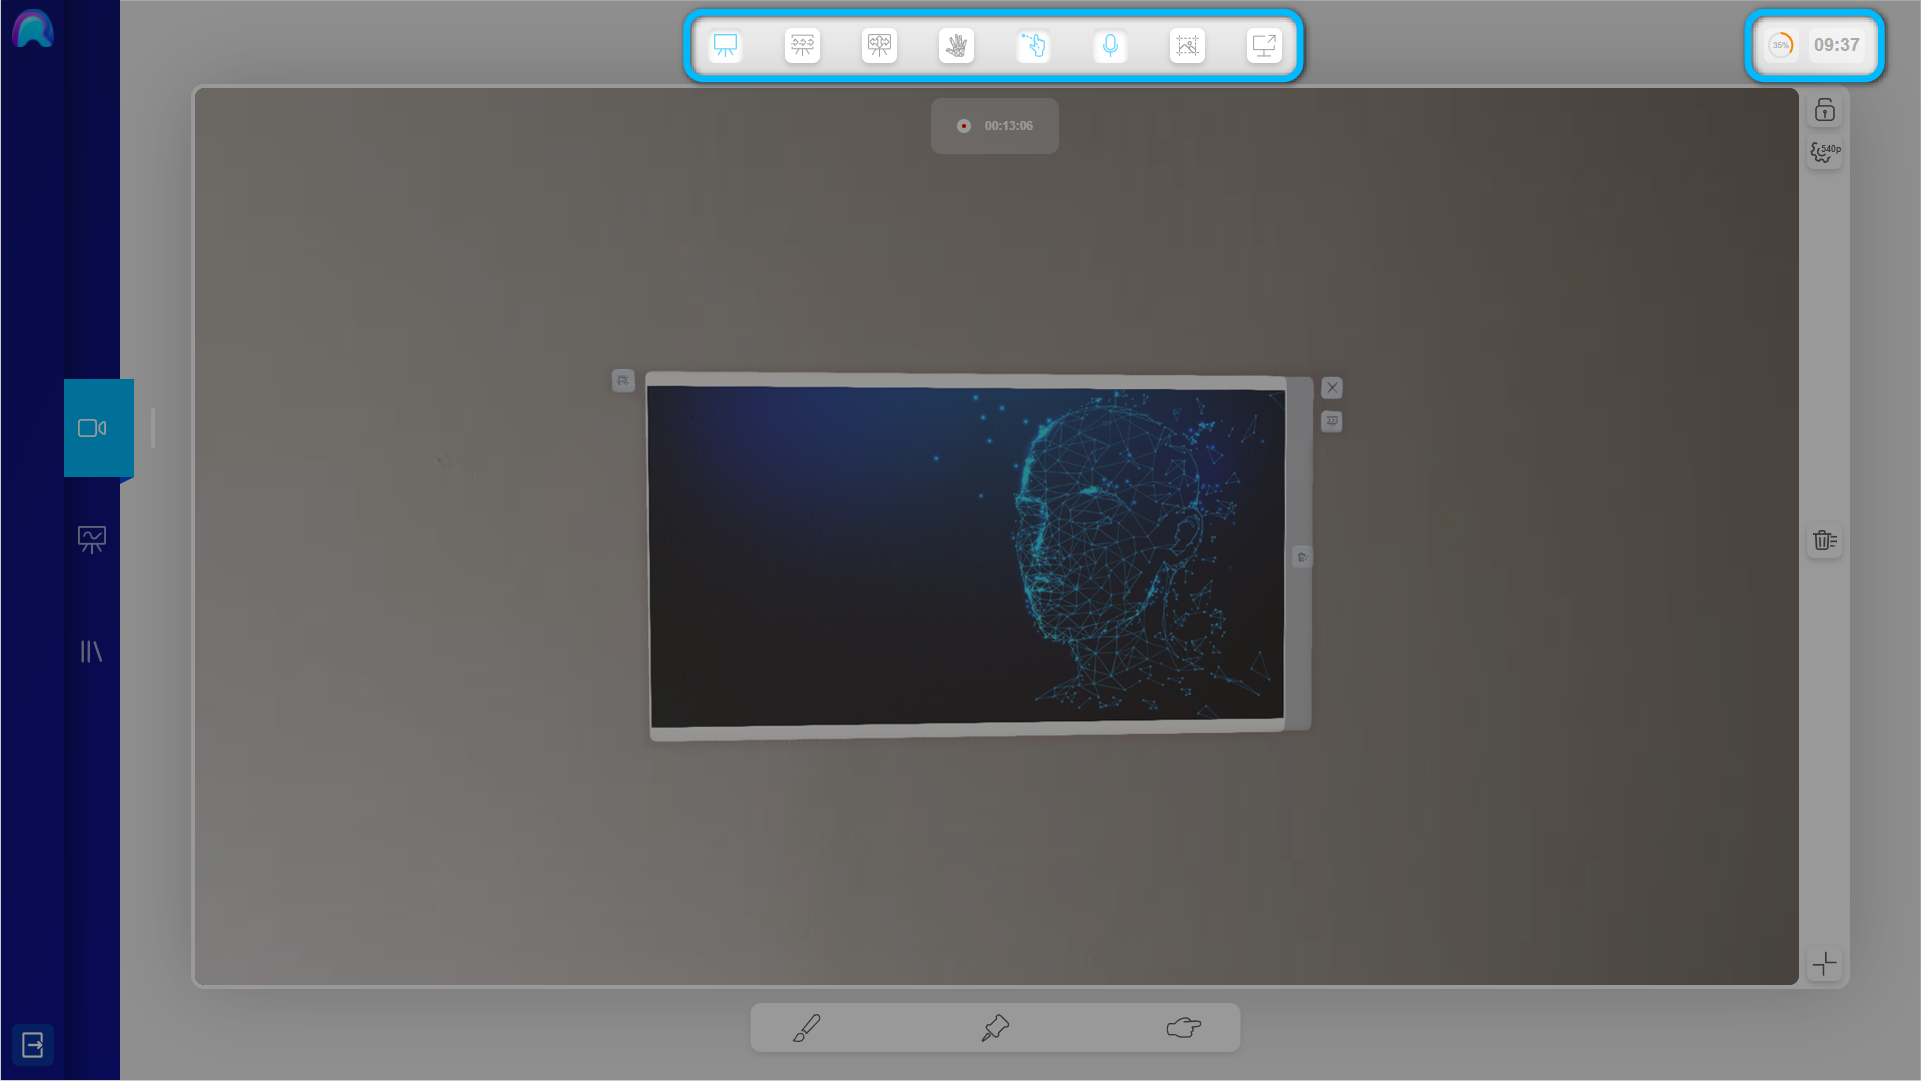

Below you will find a brief explanation of the buttons. For a more detailed description, please refer to the corresponding linked instructions.
- Whiteboard on/off: Makes the Virtual Whiteboard visible or invisible for the Operator
- Whiteboard Follow Me on/off: Enables or disables the ‘Follow Me’ functionality of the Operator’s virtual whiteboard
- Move Whiteboard: Allows the Spectator to move the Whiteboard via a panel, which opens at the bottom center of the screen
- Handoverlay on/off: Enables or disables the Operator’s Handoverlay
- Handpointer on/off: Enables or disables the Operator’s Handpointers
- Microphone on/off: Mutes or unmutes the Spectators microphone
- Operator Snapshot: Takes a snapshop from the videostream of the Operator, which is accessible in the Media Library
- Screenshare: Starts/Stops sharing parts or the entity of your screen on the Operators' Whiteboard
2) Interactive AR Tools
remAids interactive AR Tools allow you to interact with the Operators real environment and to communicate efficiently.
Our tools allow the Spectator to display Holograms on real surfaces in the Operators environment. Let’s assume the Operator has a table in front of them. With the help of the AR Tools, you can display something at the surface of that table. The Operator can walk around it and the AR content will always physically stay in the same location.
Since we therefore have to rely on the information of the smartglasses scanned surroundings, there might be some inaccuracies in the positioning. Please keep that in mind. We do not recommend using these tools, if you need a higher precision level than 5 cm.
All AR Tools can be selected in the Video View through the Tool Selection Panel at the bottom center of the screen.
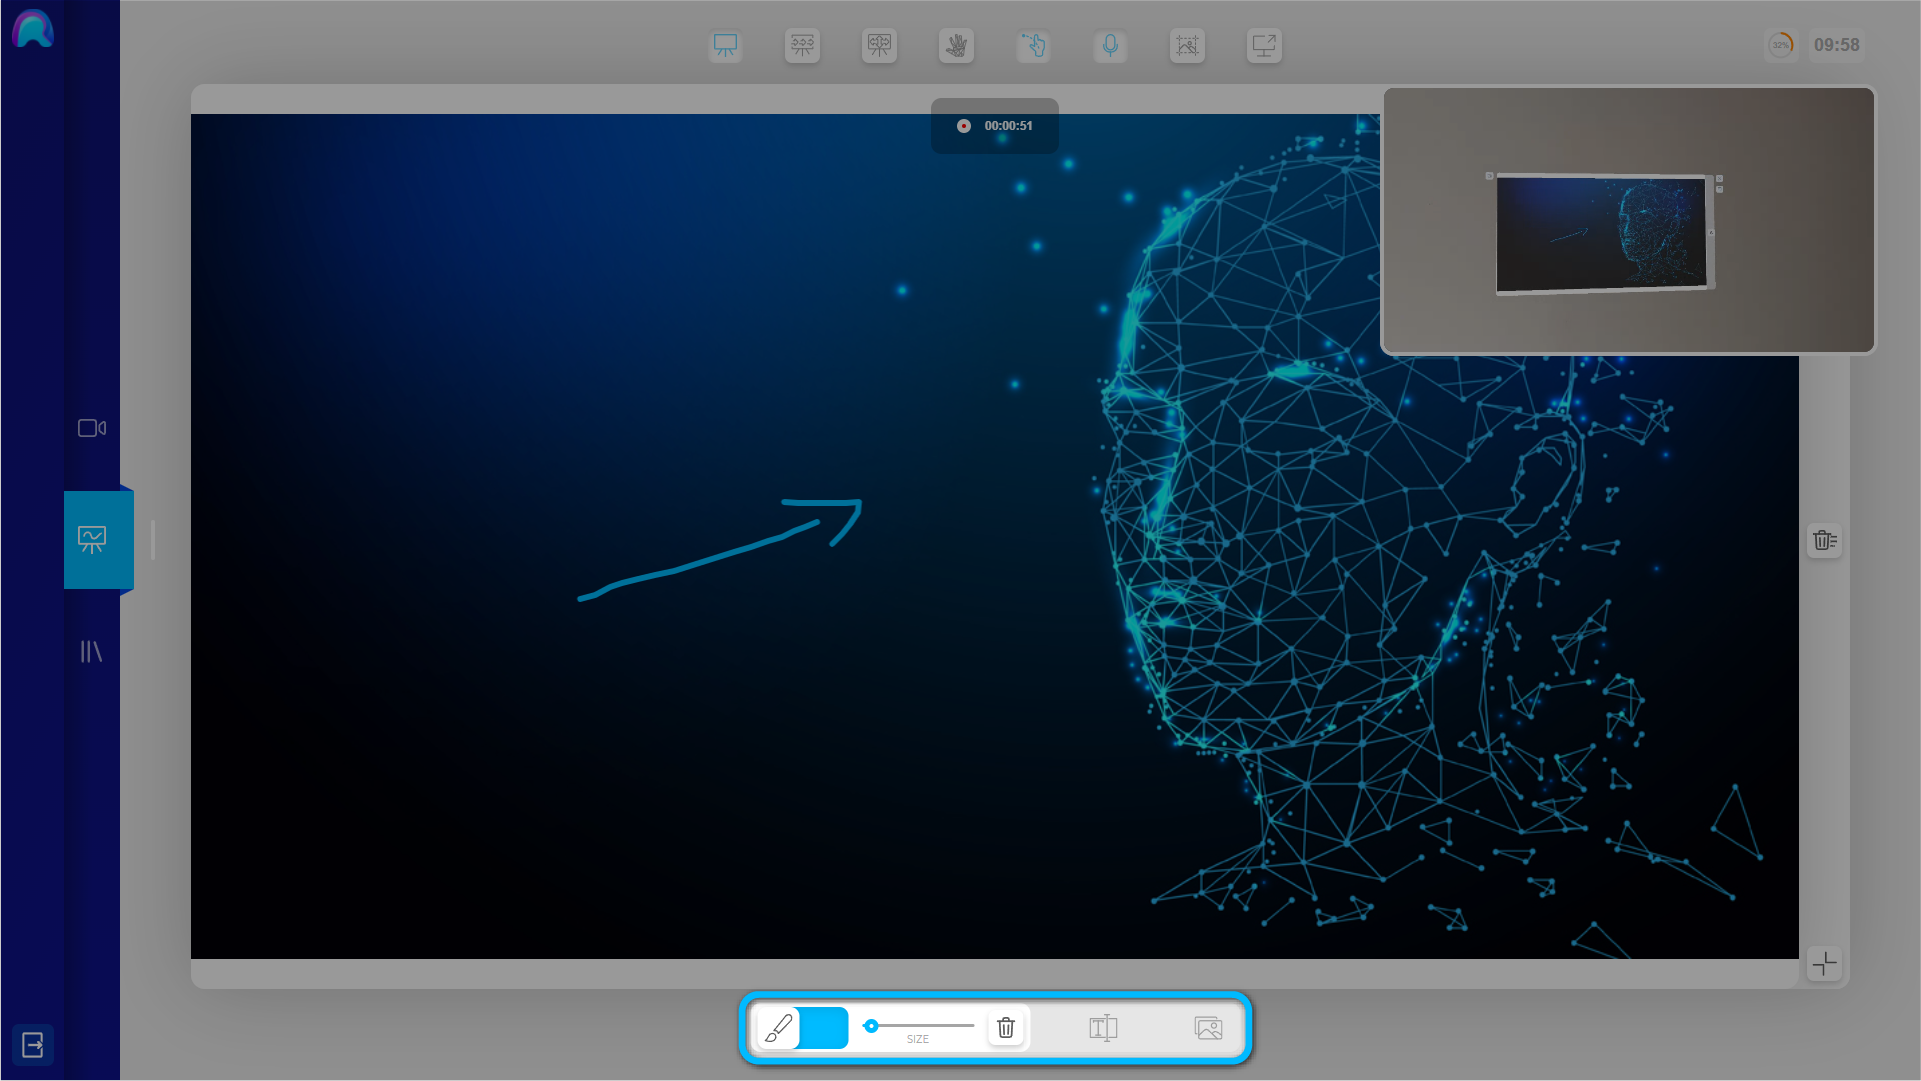
In the Tool Selection Panel, you can find the settings for each Tool. These settings options will look differently depending on the currently selected tool.
3D Mode
Some tools allow you to disable the 3D Mode of the tool. When 3D Mode is disabled, the tool will no longer conform to the scanned surroundings, but rather be displayed at a fixed distance (~100cm) from the Operators Head. It is recommended to deactivate 3D mode, when visibility and lighting conditions are unsuitable for a correct environment scanning of the smartglasses.
Drawing Tool
The Drawing Tool can be used to draw into the environment of the Operator. Cick on the Drawing Tool icon, which is represented by a brush in the central tool selection panel at the bottom.
To draw simply hold your mouse button clicked and drag on the video. A line will be drawn until you release the mouse button.
In the Tool Settings Panel you can adjust the Drawing Tool to your needs:
- The color selector changes the color of the drawn stroke. When you click at the little arrow next to the colors the color picker opens up and you can choose an individual color.
- The Size Slider adjusts the width of the stroke.
- Enable/disable the 3D Mode of the Drawing Tool.
- By pressing CTRL + Z you can remove your last stroke.
- The ‘Clear’ button deletes all drawings.
Pin Tool
The Pin can be useful to mark specific locations in the Operators environment. You can place up to 20 Pins. To select a Pin click on the Pin icon in the Tool Selection.
To place a Pin simply drag the mouse cursor on the desired spot in the videostream. Click on the spot and the Pin will appear at the respective position in the Operators environment. It is important to hold the mouse pointer pressed until you have correctly positioned the Pin. When you release the mouse pointer, the pin will be placed at that location and stay there, until you delete it.
In the Tool Settings Panel you can adjust the Pin to your needs:
- The color selector at the bottom of the screen allows you to change the color of the next placed Pin. When you click at the little arrow next to the colors the color picker opens up and you can choose an individual color.
- The size slider allows you to change the size of the Pin.
- By pressing CTRL + Z you can remove your last Pin.
- The Clear Button will remove all placed Pins.
Laserpointer Tool
The Laserpointer can be very useful, in case you quickly want to guide the Operator to a specific location or object in their environment. It works just like any regular laserpointer. To select the Laserpointer, open the Tool Selection and select the Laserpointer Tool in the toolbar on the right.
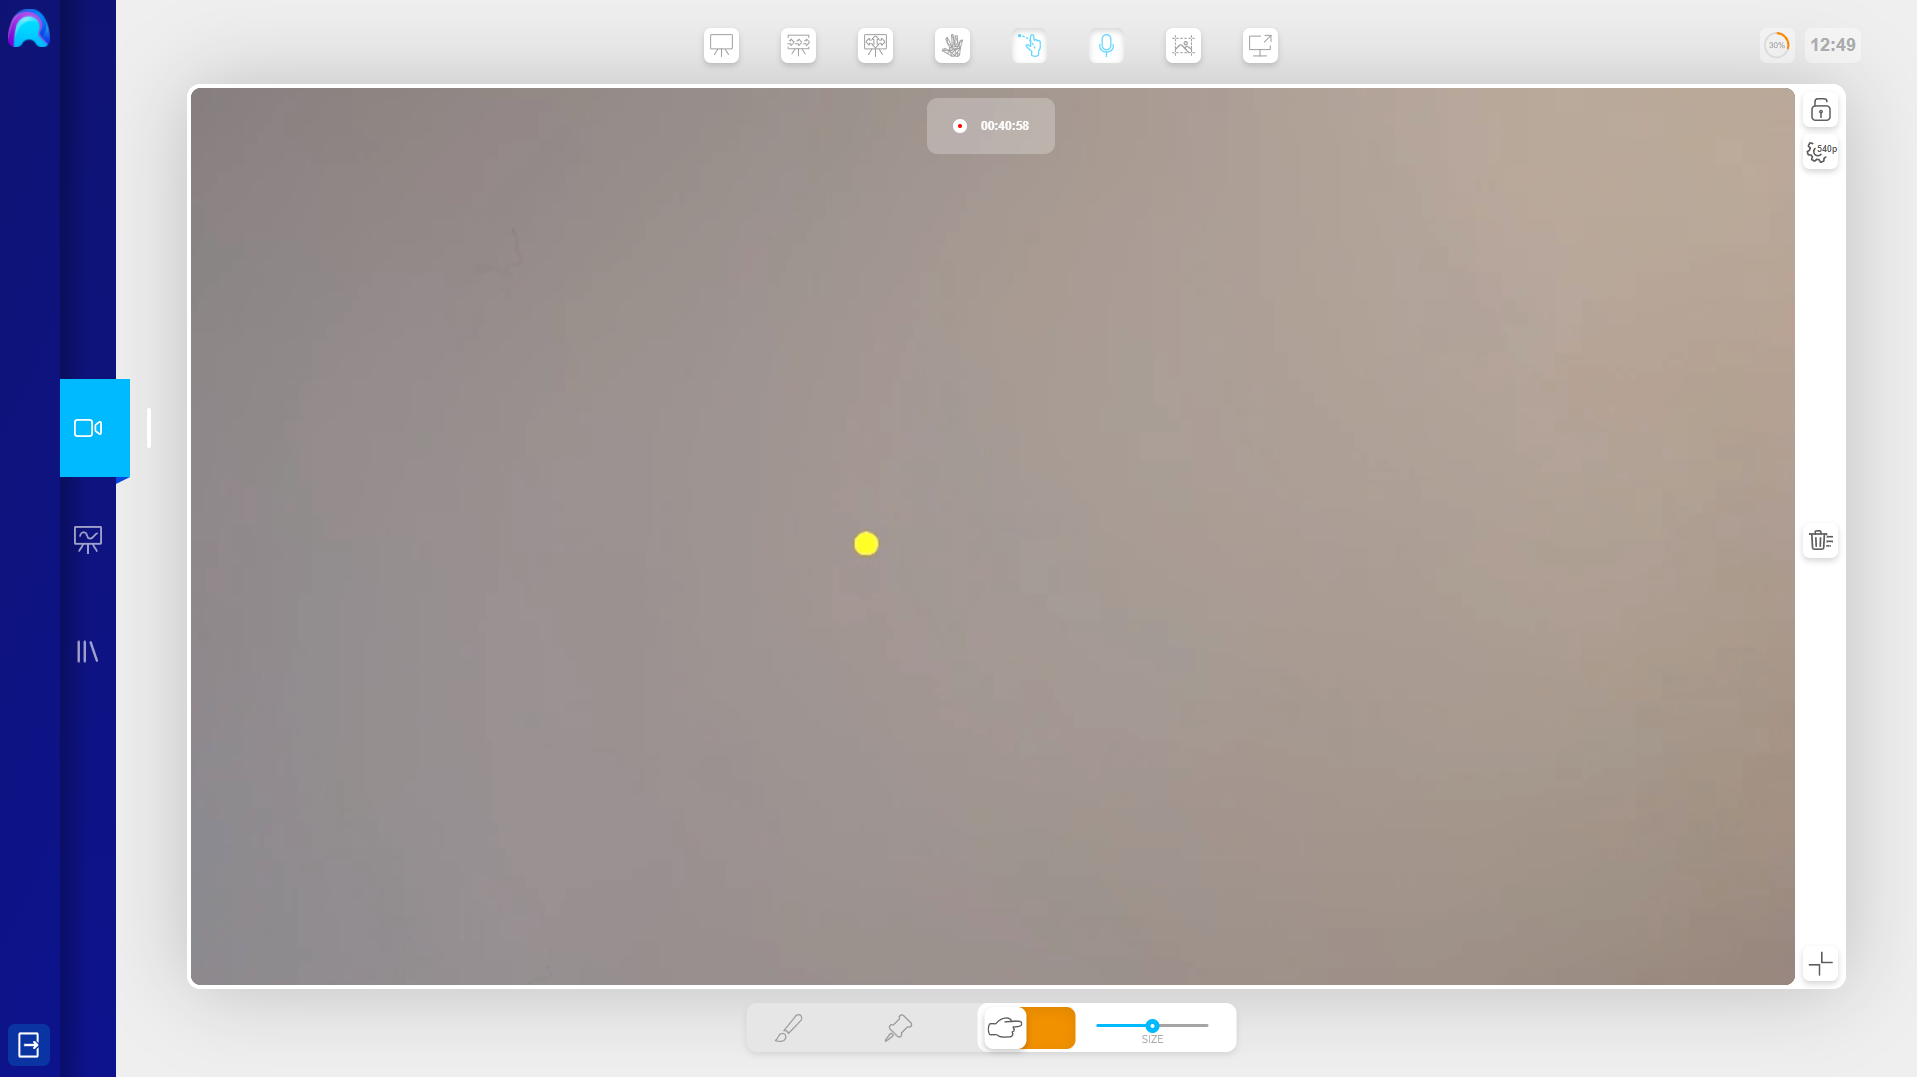
Drag the mouse cursor on the video stream, while pressing the left mouse button and a small Laserpointer will appear. Once you release the mouse button the Laserpointer will disappear.
Via the Tool Settings Panel at the bottom of the screen you can adjust the Laserpointer according to your needs:
- The color selector allows you to change the color of the Laserpointer. When you click at the little arrow next to the colors the color picker opens up and you can choose an individual color.
- The size slider allows you to change the size of the Laserpointer.
Using the Video Lock
There are situations in which it might be difficult to accurately use the AR Tools, because the Operator is moving too much. This especially creates a problem,when the Drawing Tool is used. To remedy this, remAid provides you with an option to freeze the videostream of the Operator. That makes the videostream sufficiently stable to use the various Tools.
To lock the video press the ‘Lock Video’ button in the right sided Menu Bar, right next to the video stream. This will freeze the video and allows you to comfortably set your Drawings, Laserpointer or Pins at the desired position.
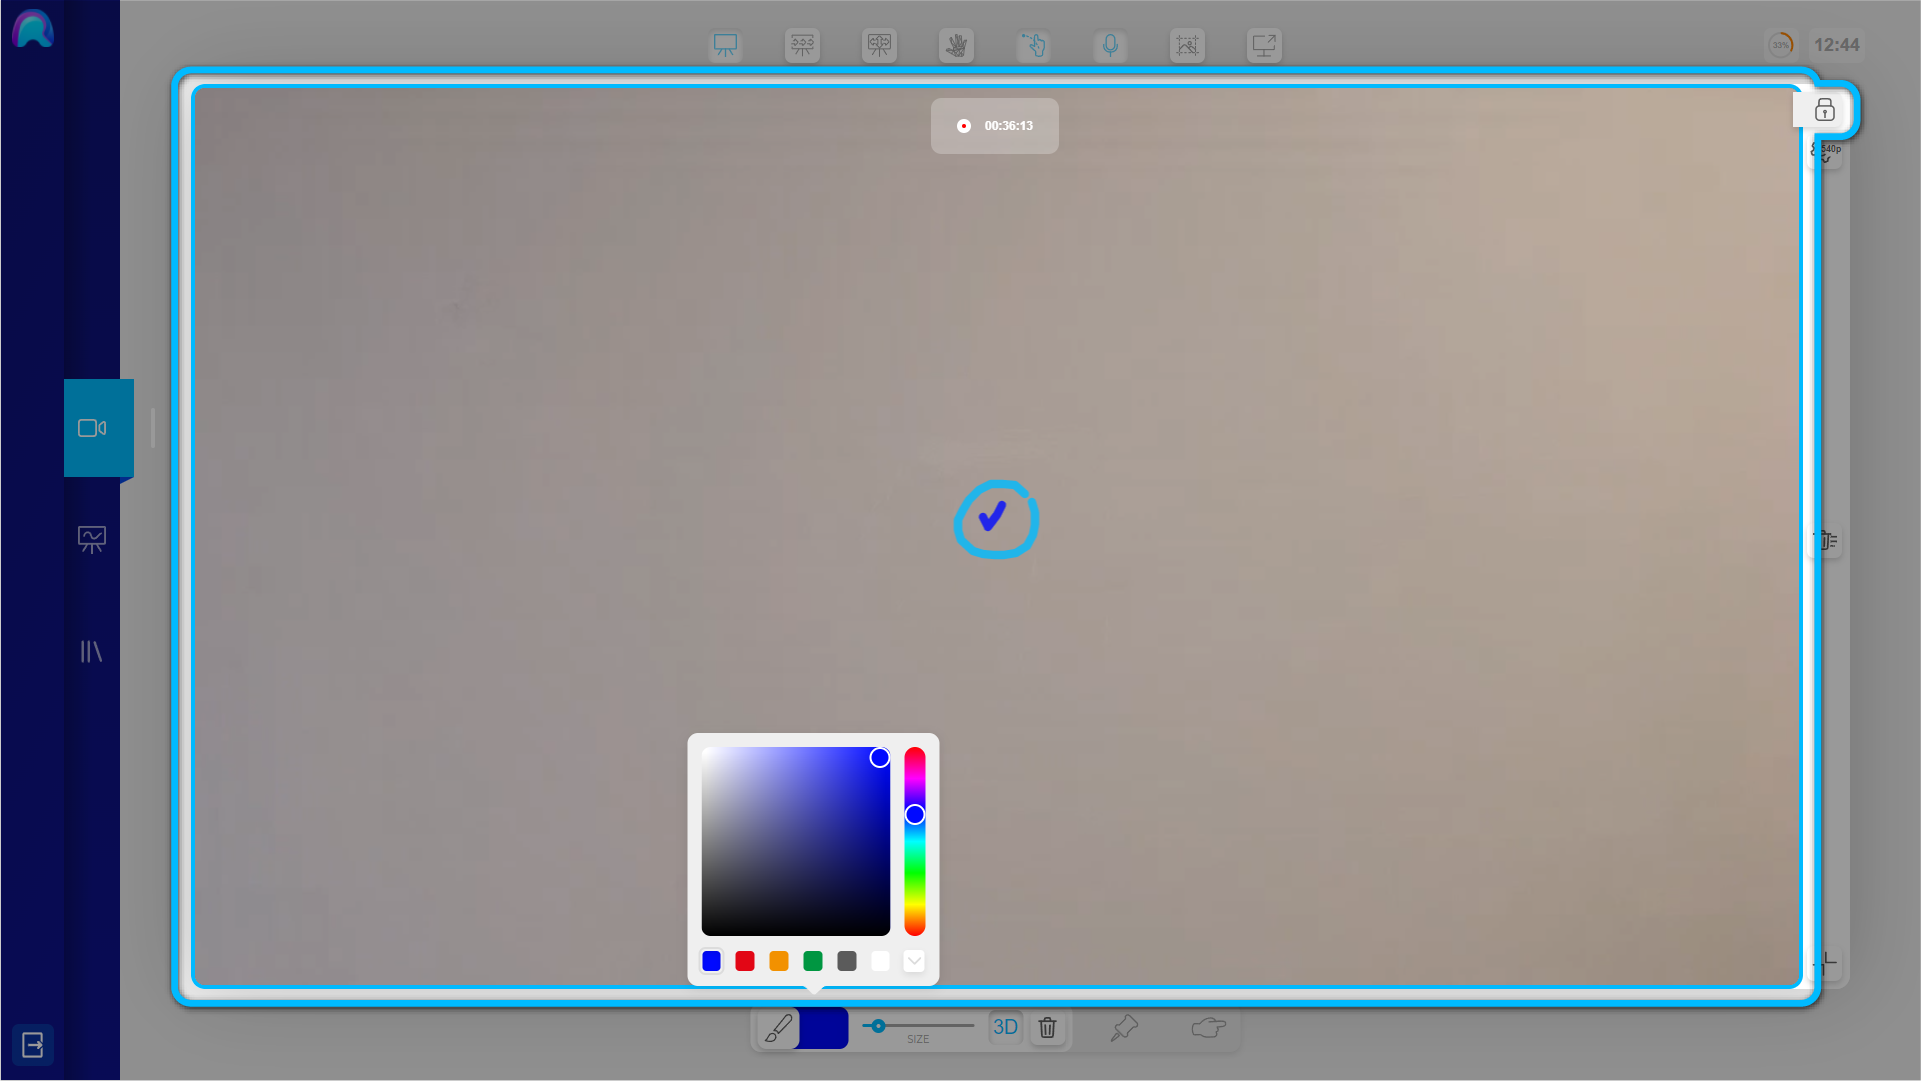
It can be beneficial to in advance tell the Operator to take a position, where you have a good view on the object, that you want highlight. Advise him to hold still, while you are pressing the lock button to avoid any blurry effects.
Lateral Menu Bar
In the lateral Menu Bar on the right side of the video stream, you can find different video stream settings.
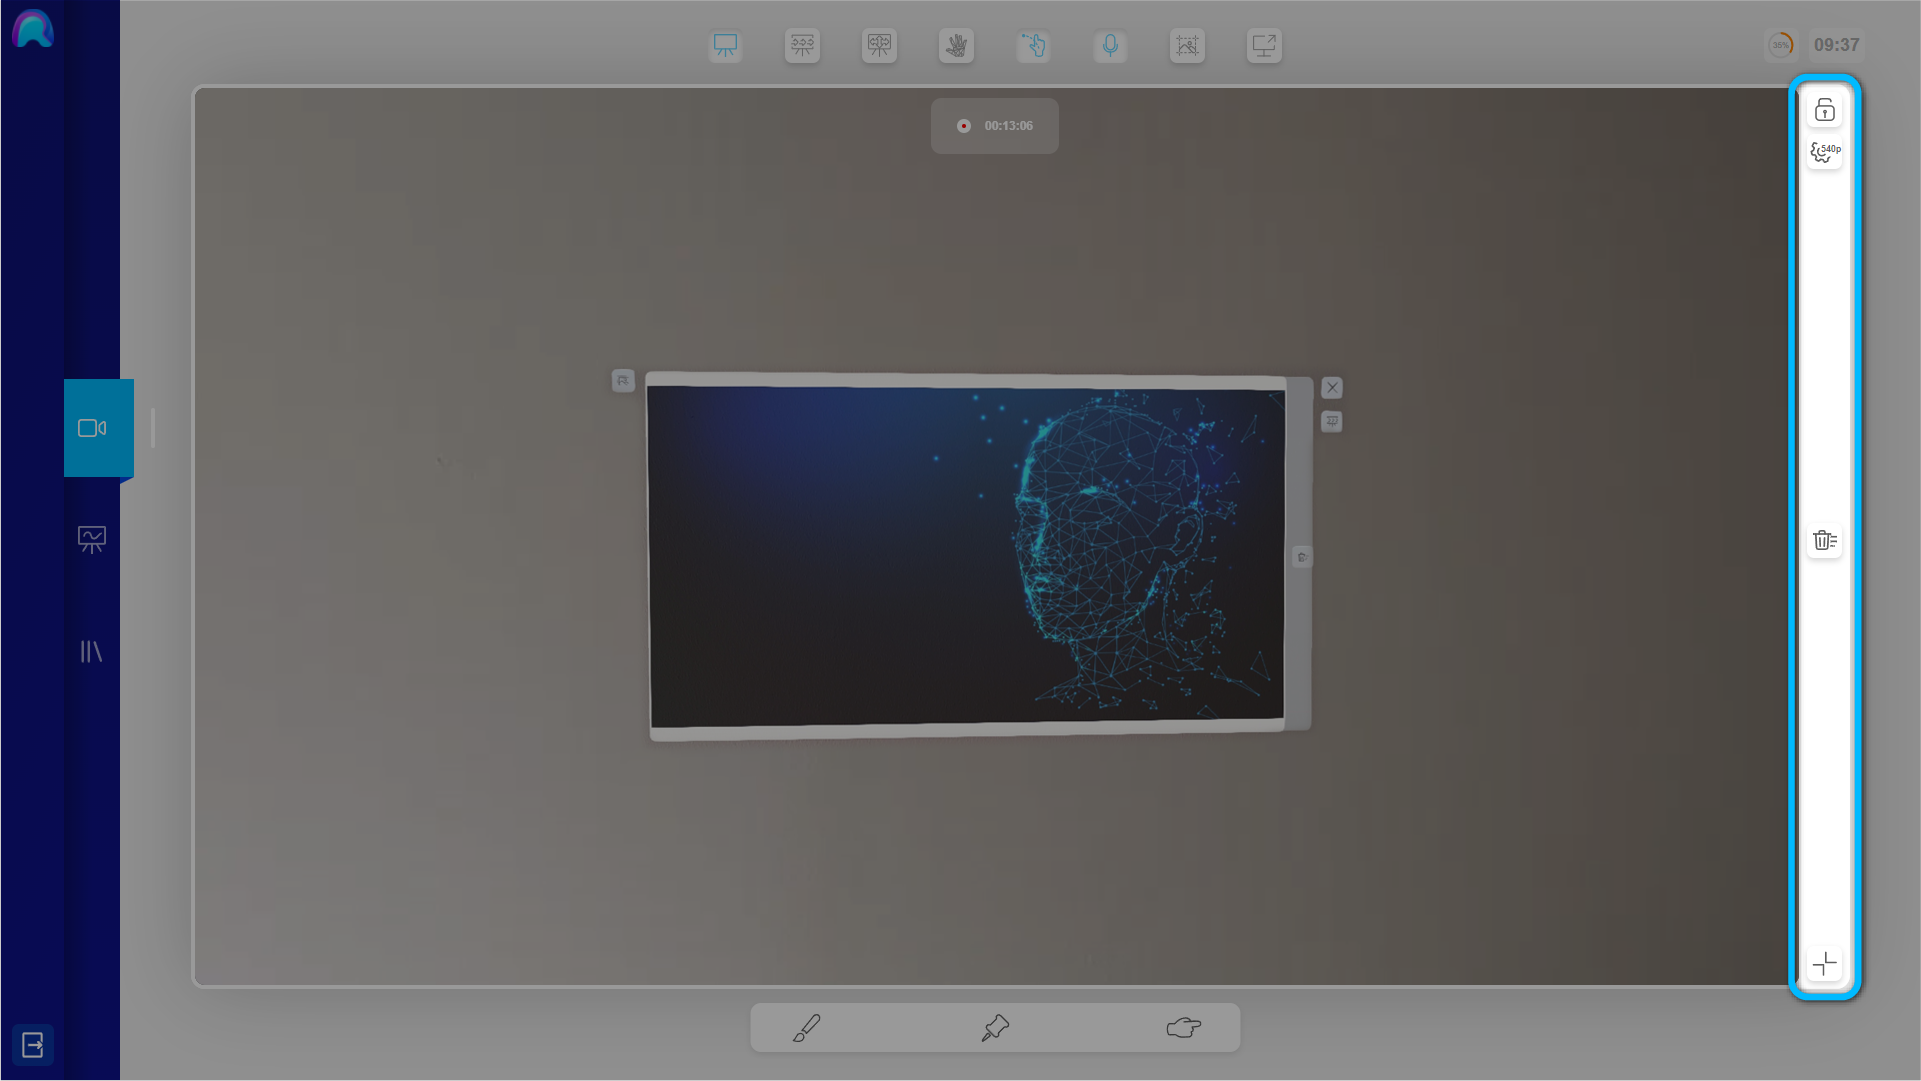
- Lock Operator Video: Freezes the Operator video stream to allow you to better draw, pin or point on it
- Video Quality: Allows you to set the quality of the video stream received by the Operator.
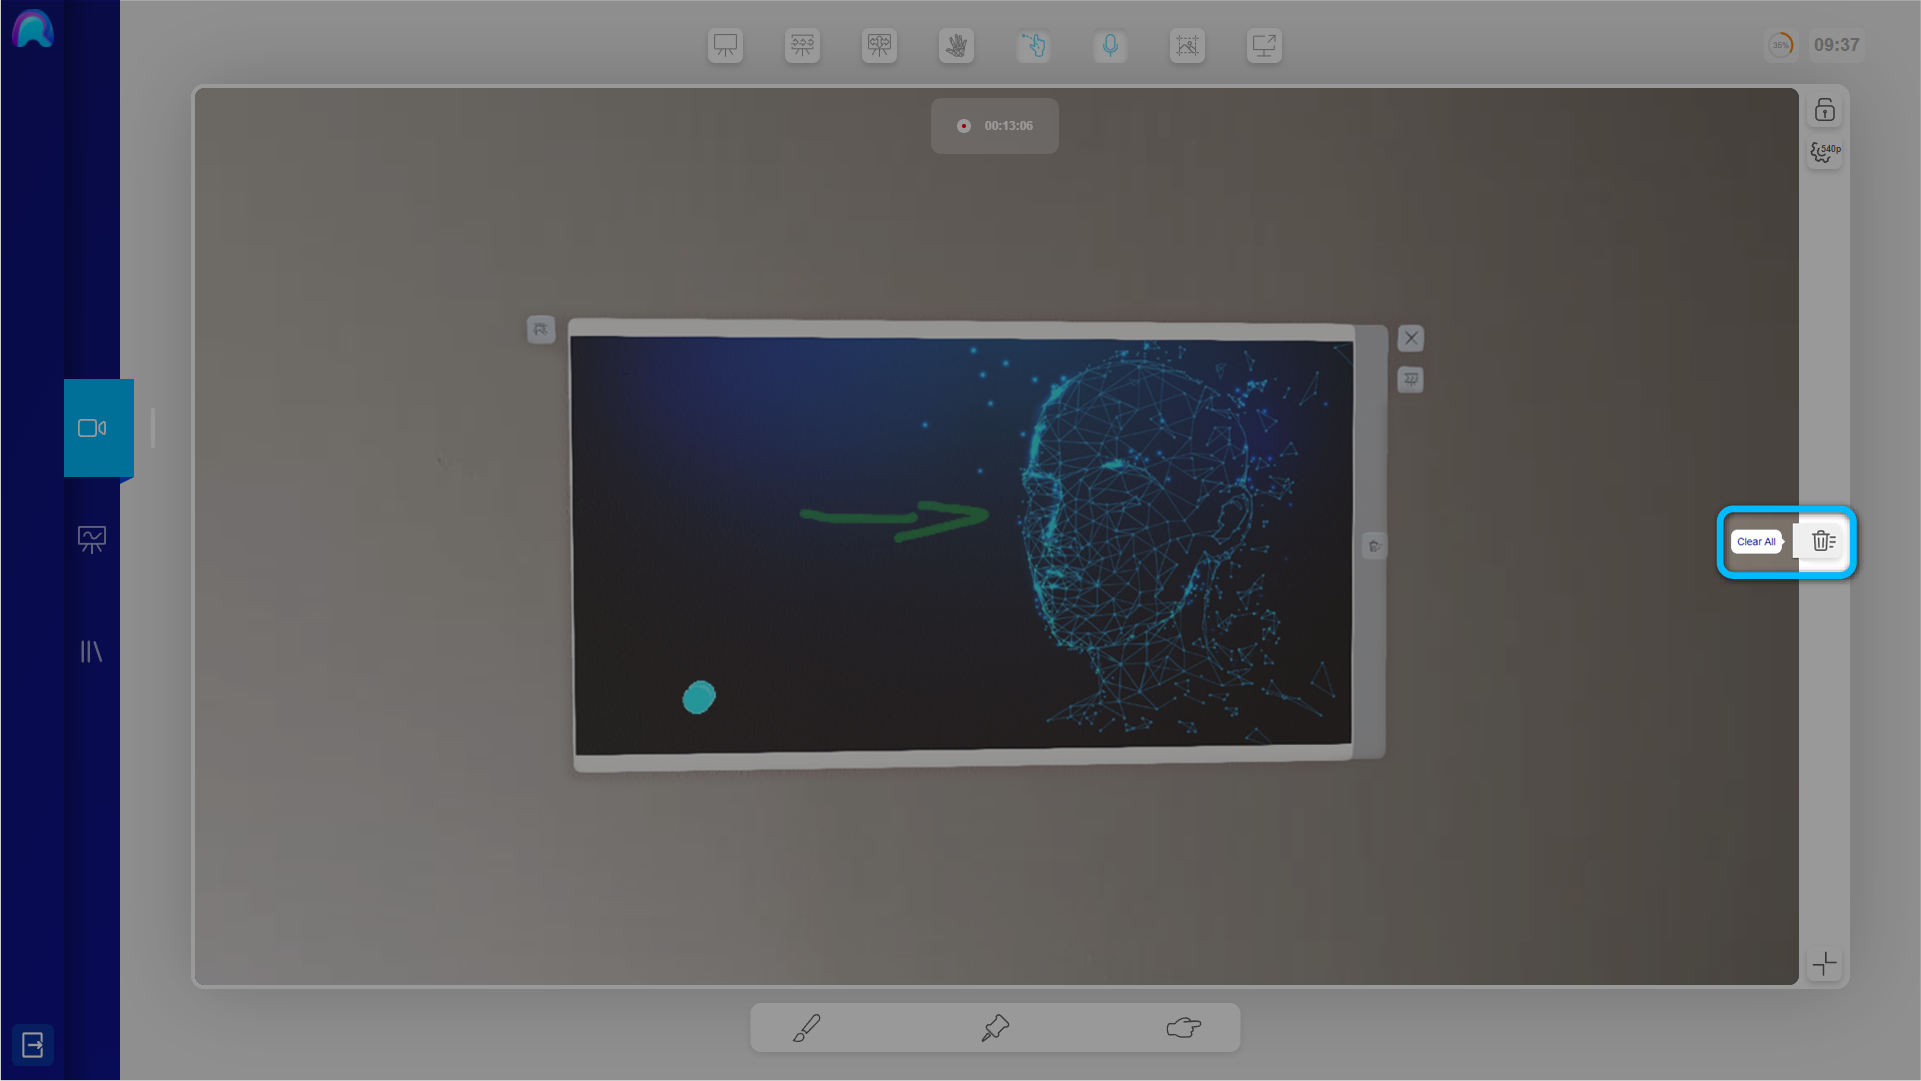
- Clear All: Clears all Drawings, Pins or Pointers in the Operators AR view
- Fit/Fill: Adjusts the size of the main content so that it either completely fills the screen or fits inside of the screen
Clear All Interactive AR Tools
In case you want to delete all Drawings and Pins at once, you can use the 'Clear All' button in the right sided menu bar.
Adjusting the video quality
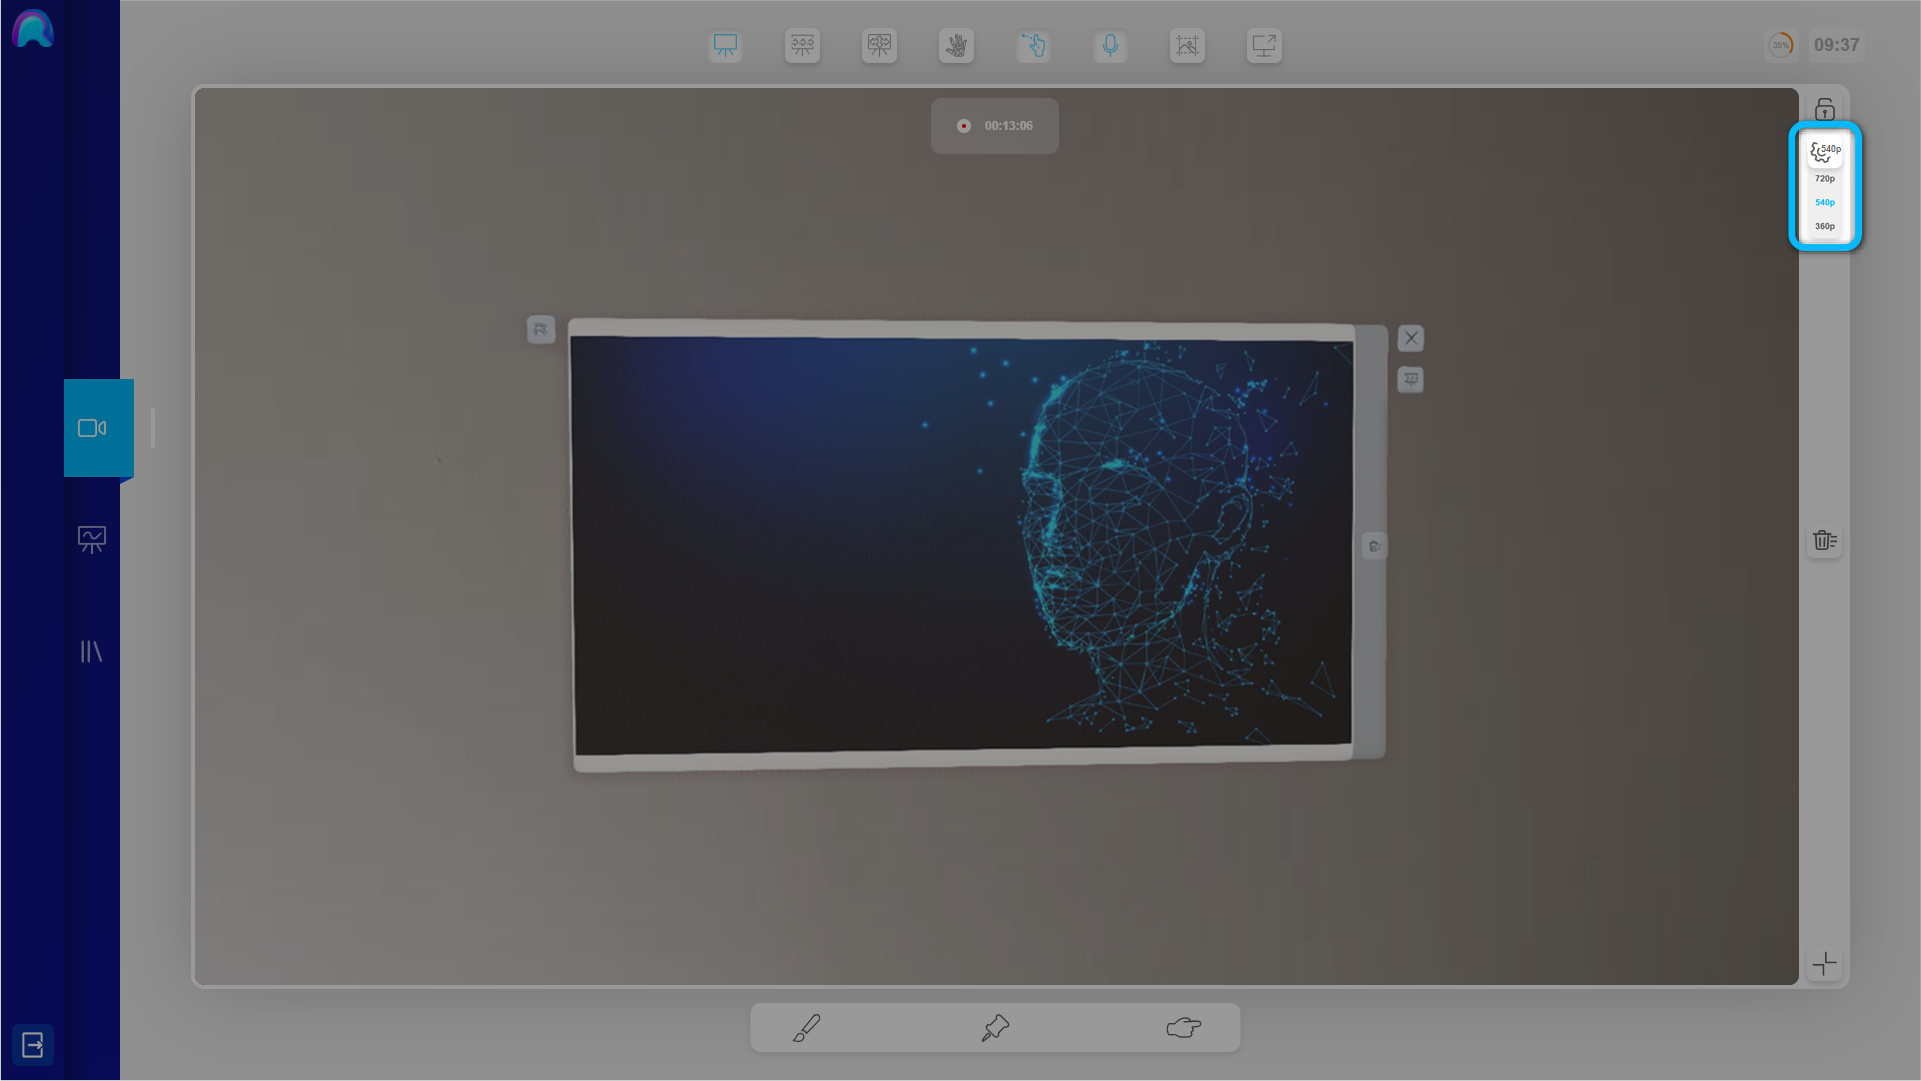
By default the video quality of the stream is set up for 540p. You can choose between 3 different quality settings (360p, 540p, 720p). A low available bandwidth (e.g. LTE) might result in reduced and sluggish video quality. To get a more fluent videostream, it can help to reduce the video quality.
The video stream quality can be adjusted by clicking on the Video Quality button in the right sided Menu Bar, next to the videostream.
Keep in mind that, you won’t be able to see what the Operator is doing, while the video is frozen.
To unfreeze the video, simply press the ‘Lock Operator Video’ button again and the videostream will become fluid again.
