Enabling the Virtual Whiteboard for the Operator
If you want to interact through the Virtual Whiteboard, you have to enable it first in the field of view of the Operator.
However, you will be able to still do almost everything that is covered in this article, without turning on the Whiteboard for the Operator. This can especially be useful in case you want to prepare something in advance, before sharing it with the Operator.
To enable the Virtual Whiteboard you simply have to click on the ‘Whiteboard’ button in the Top Menu Bar. To disable it click on the button again.
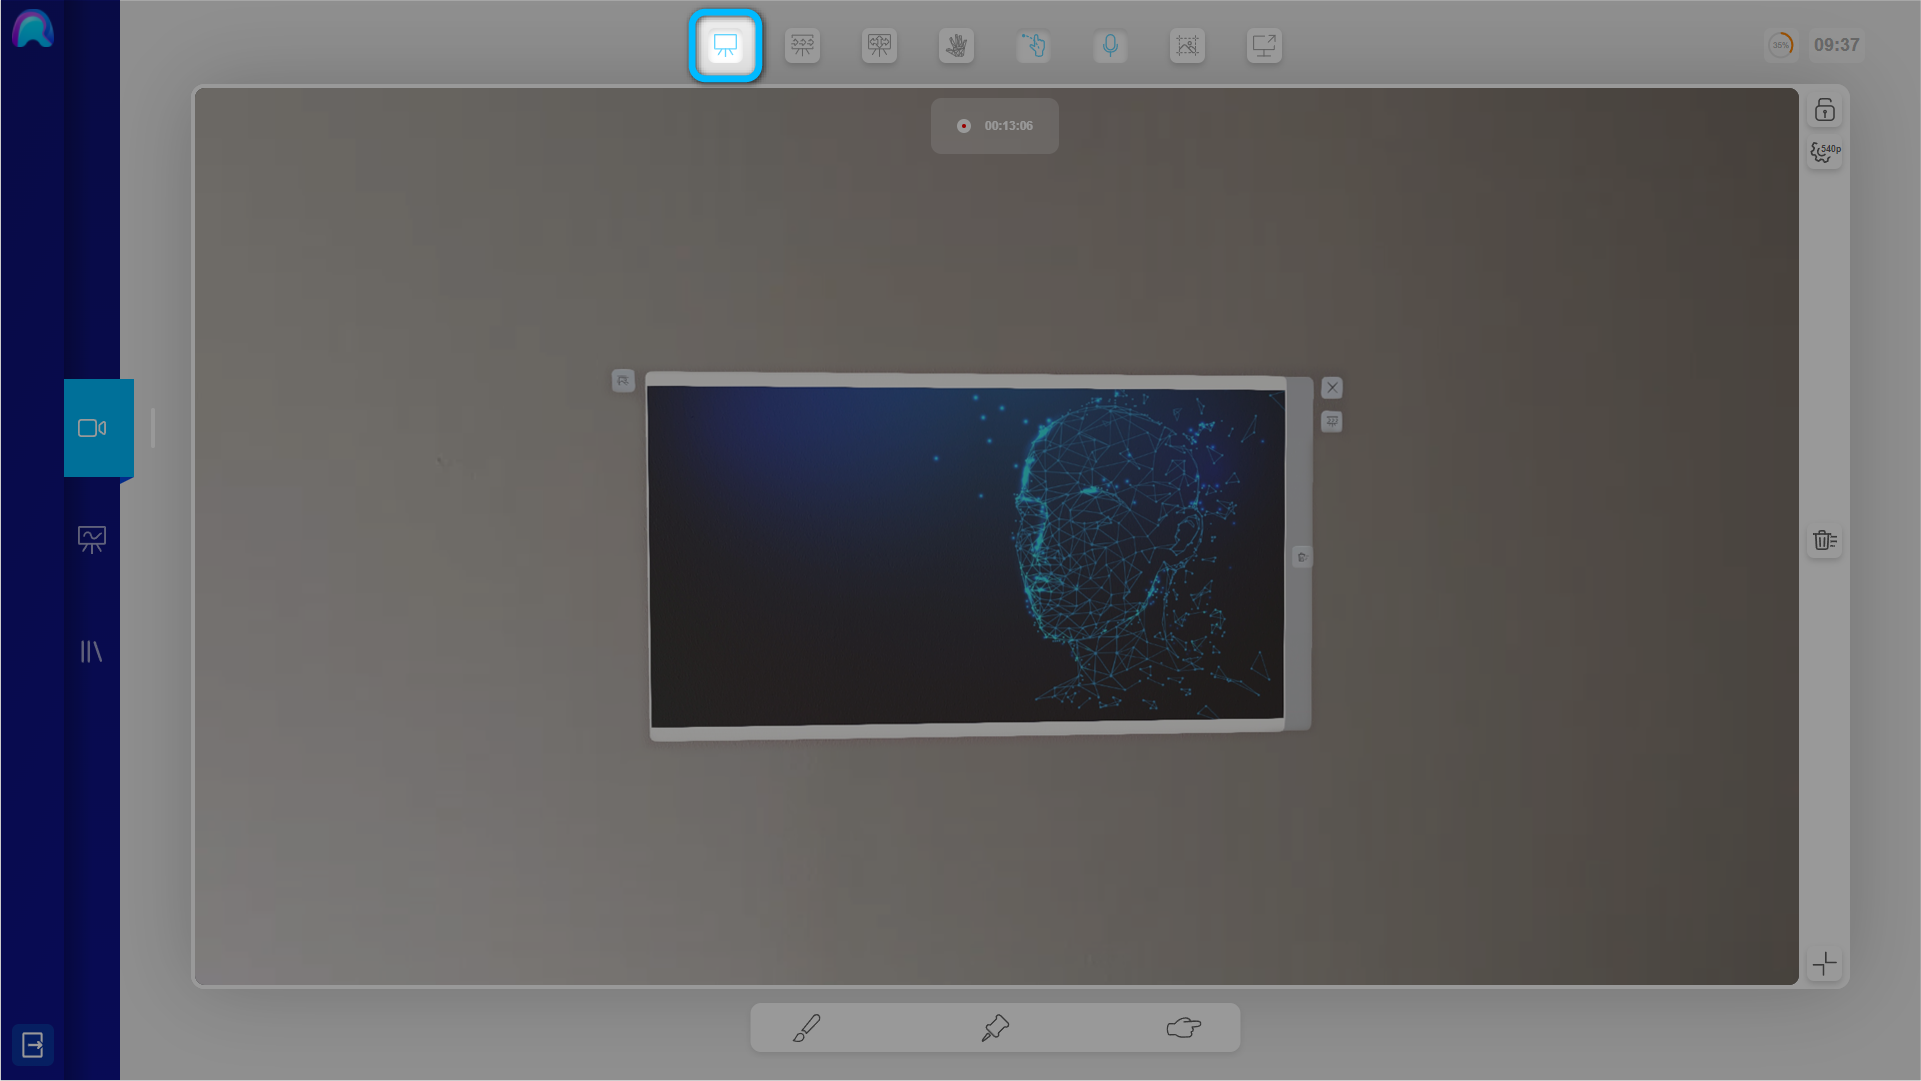
To learn more about how the Operator can handle the Virtual Whiteboard, please check out our HoloLens Virtual Whiteboard Guide.
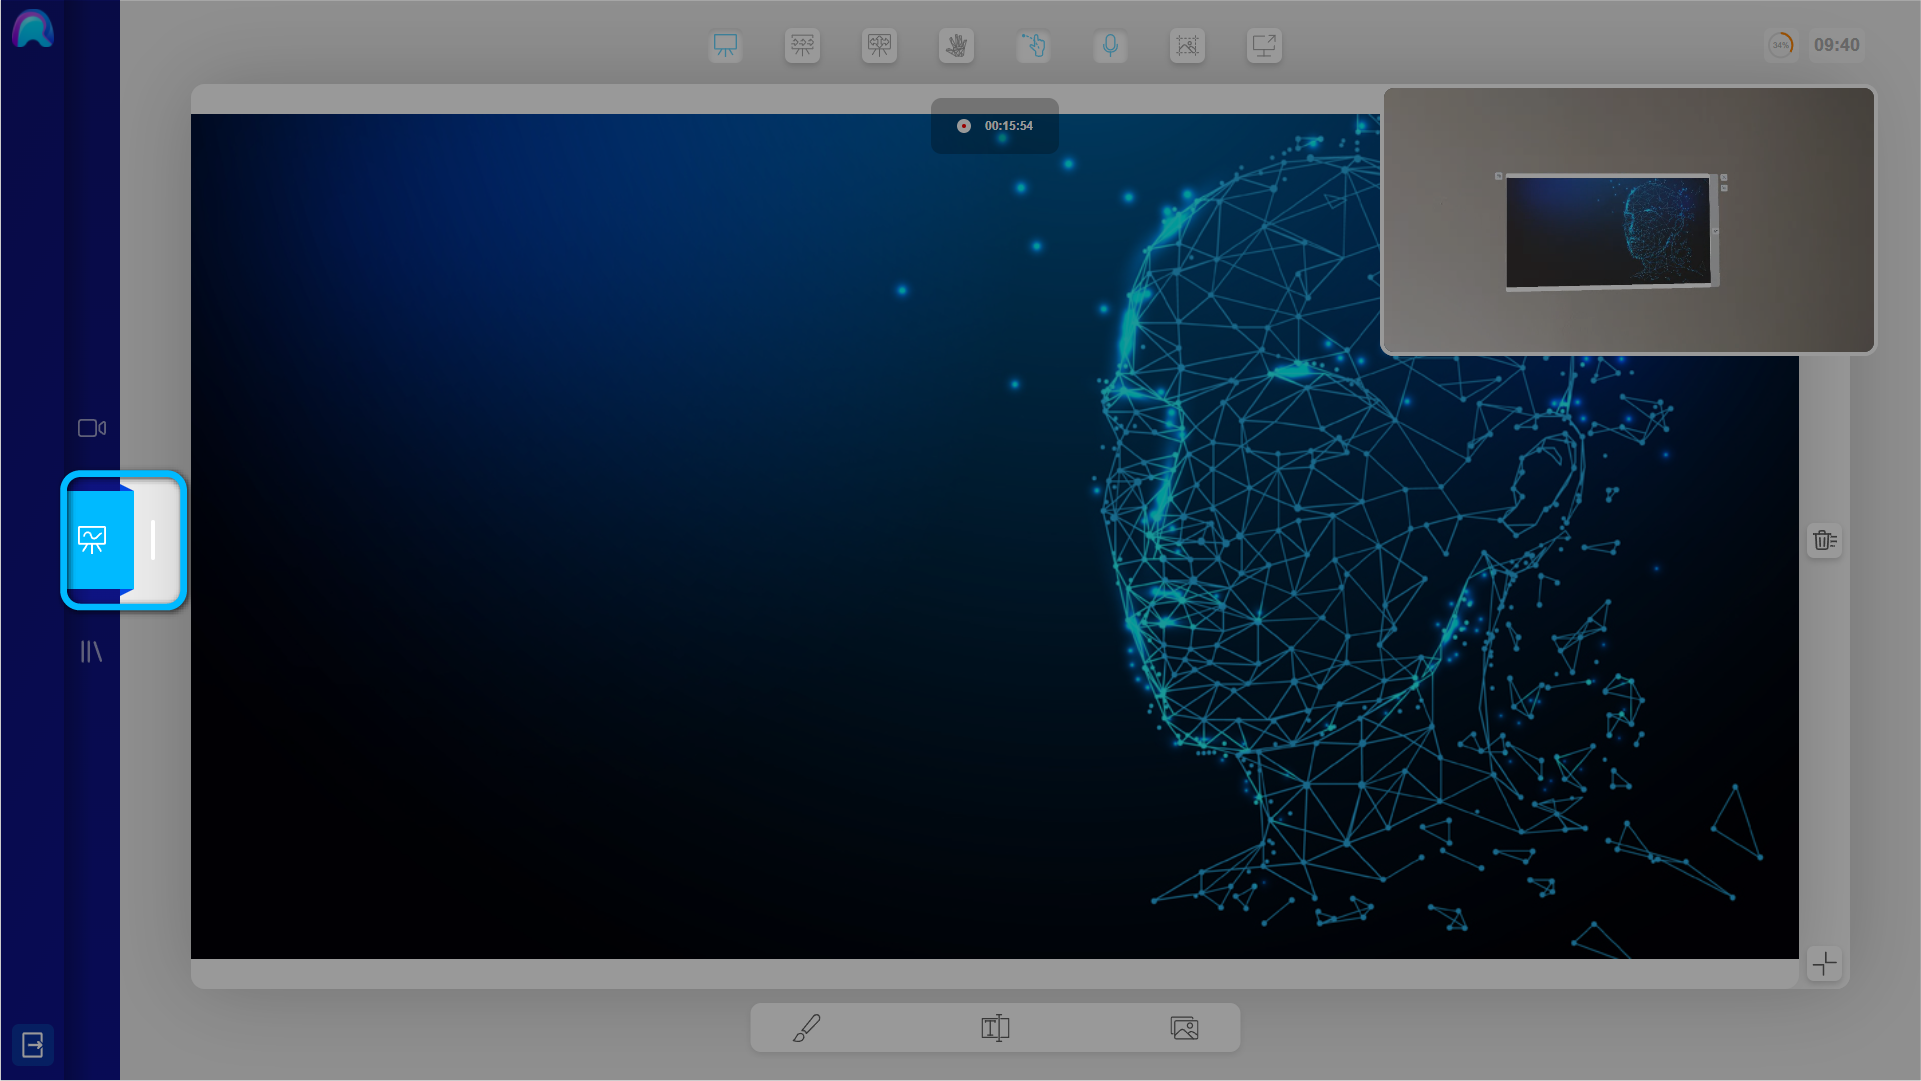
To start working on the Whiteboard, you now have to switch to the Whiteboard View.
Therefore you have to click on the Whiteboard icon in the middle of the left sided menu bar.
Drawing on the Virtual Whiteboard
To create drawings on the Virtual Whiteboard, you have to select the Drawing Tool via the Tool Selection Panel at the central bottom bar of the screen.
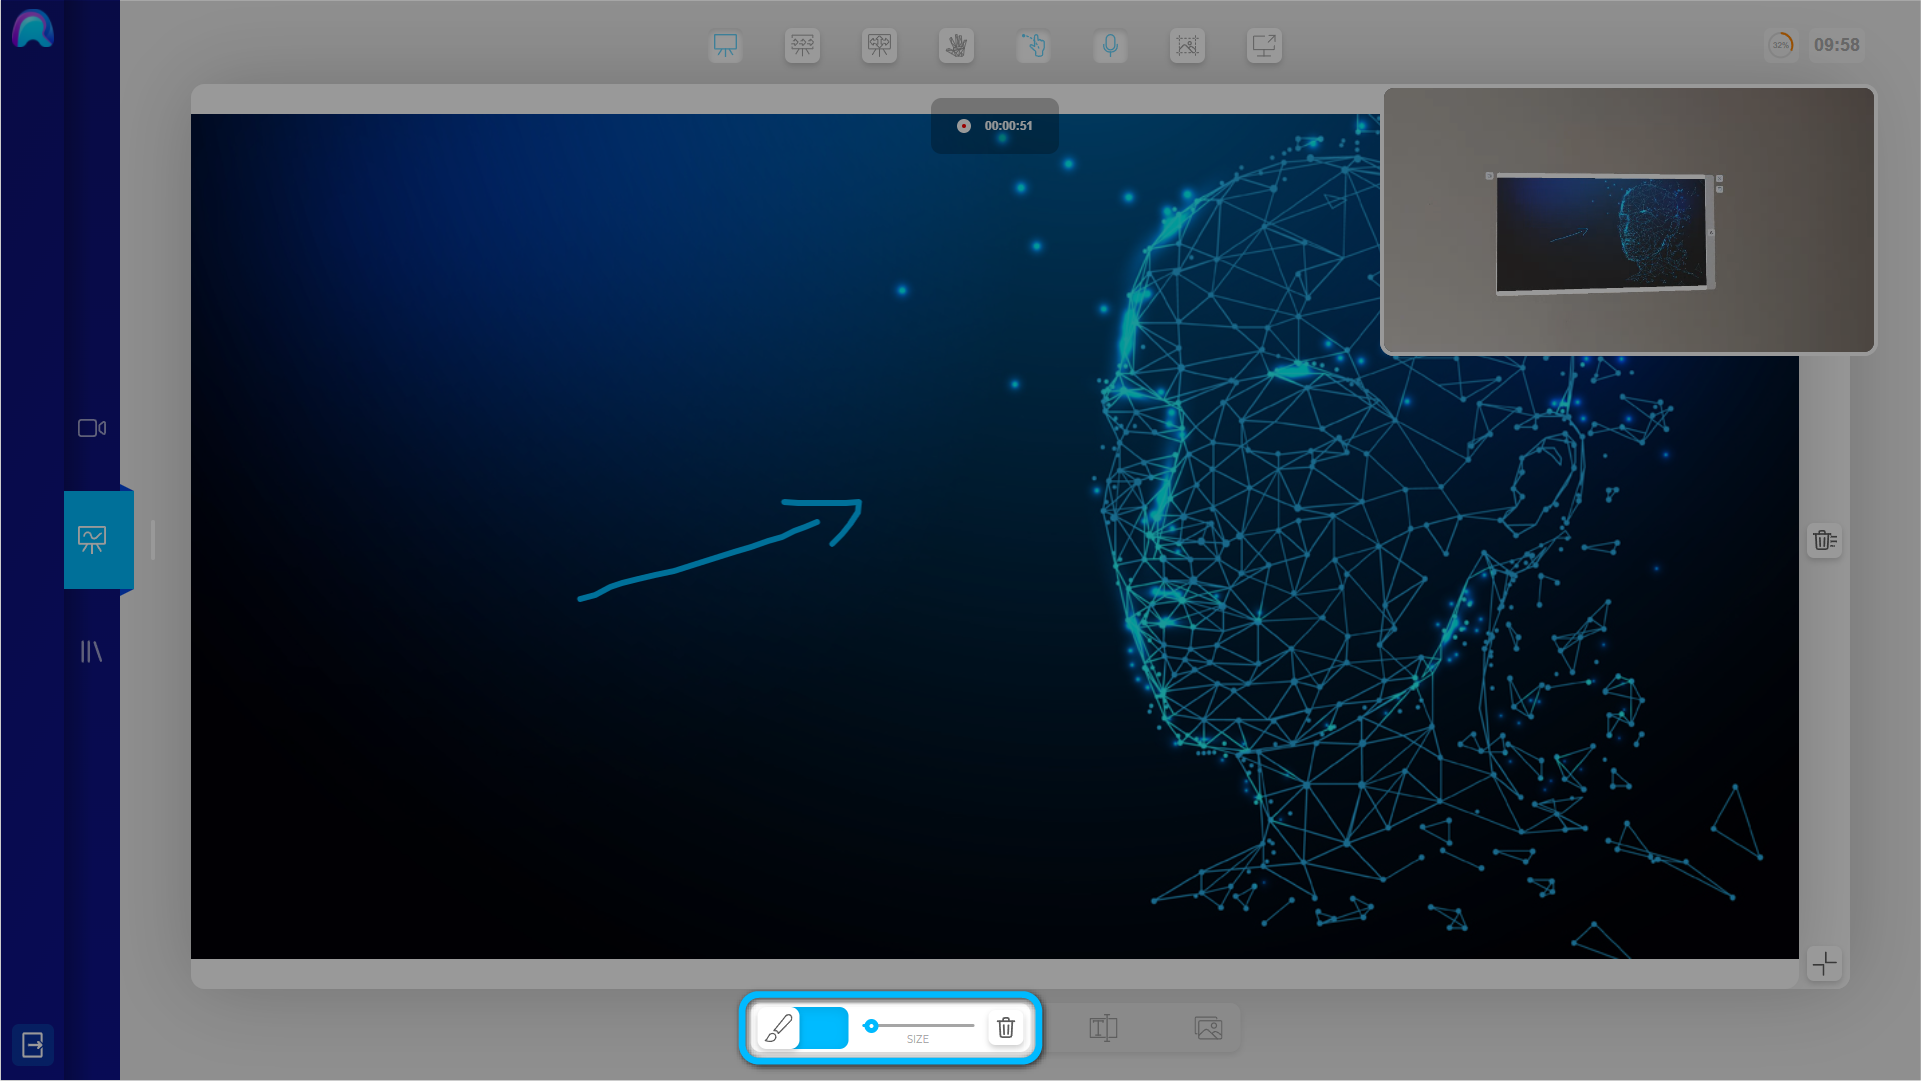
Whenever the Drawing Tool is selected, you can start drawing. To draw, click somewhere on the Whiteboard and drag the mouse pointer to draw a line.
You can adjust the Drawing Tool as followed:
- The color of the brush can be changed, by clicking onto the color field. Clicking on it opens up a panel with a selection of 6 predefined colors, allowing you to choose the color you want to draw with.
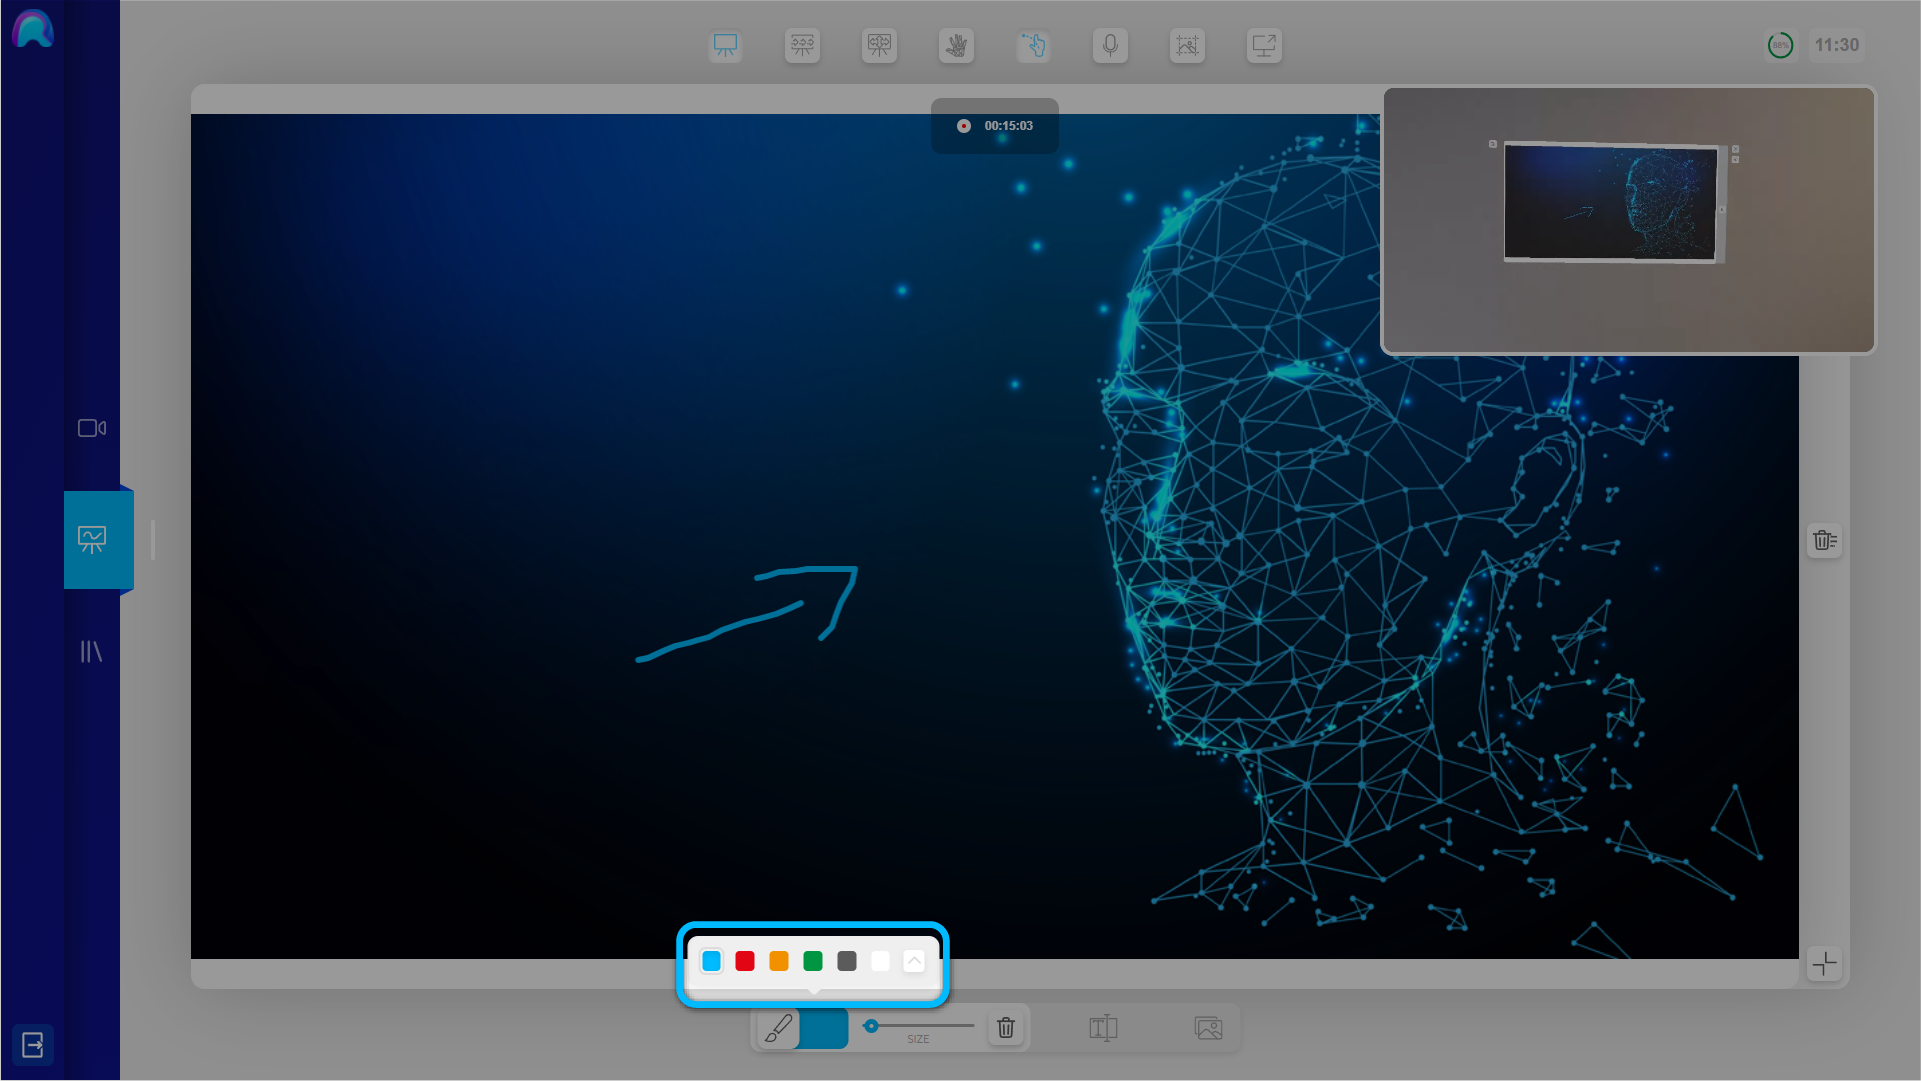
You can also choose a color from the color picker, by clicking on the arrow right next to the six color options. The color that you choose will be automatically added to the predifined color fields.
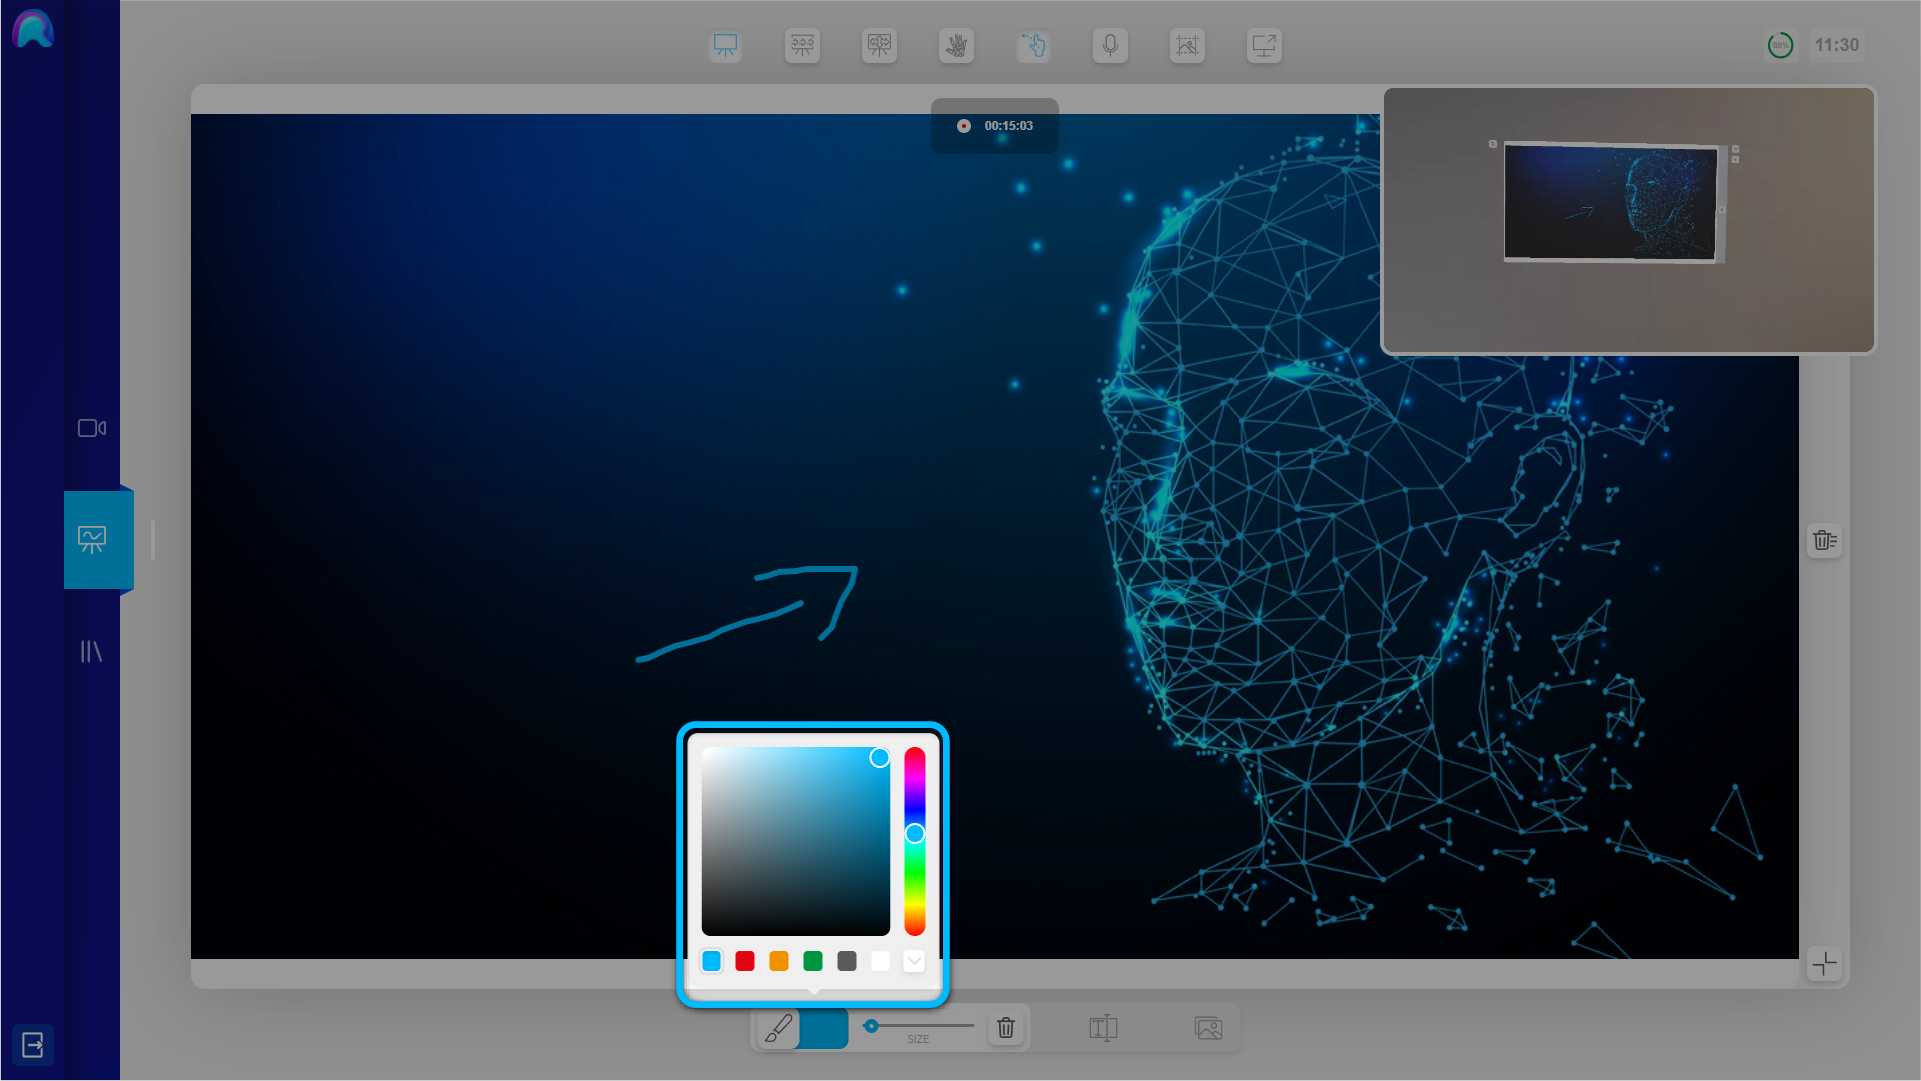
-
Change the size of the drawn line by dragging or clicking the Size Slider.
-
With the Delete Button you can delete all drawings on the Whiteboard.
-
You can also just undo your last stroke by pressing "Ctrl + Z".
Writing Text on the Virtual Whiteboard
Select the Text Tool in the Tool Selection Panel at the bottom center menu bar.
After selecting the Text Tool, create a new text field on the Whiteboard by clicking inside the Whiteboard’s canvas. Wherever you click the text field will be located.
Then you can start typing. Make sure to always stay inside the area of the Whiteboard. You cannot write outside of this area. To confirm the written text, simply click outside of the text field.
After confirming a text you are not able to edit it anymore. You can only undo or clear the entire text.
When the Text Tool icon is clicked, you can find the settings menu right next to it.
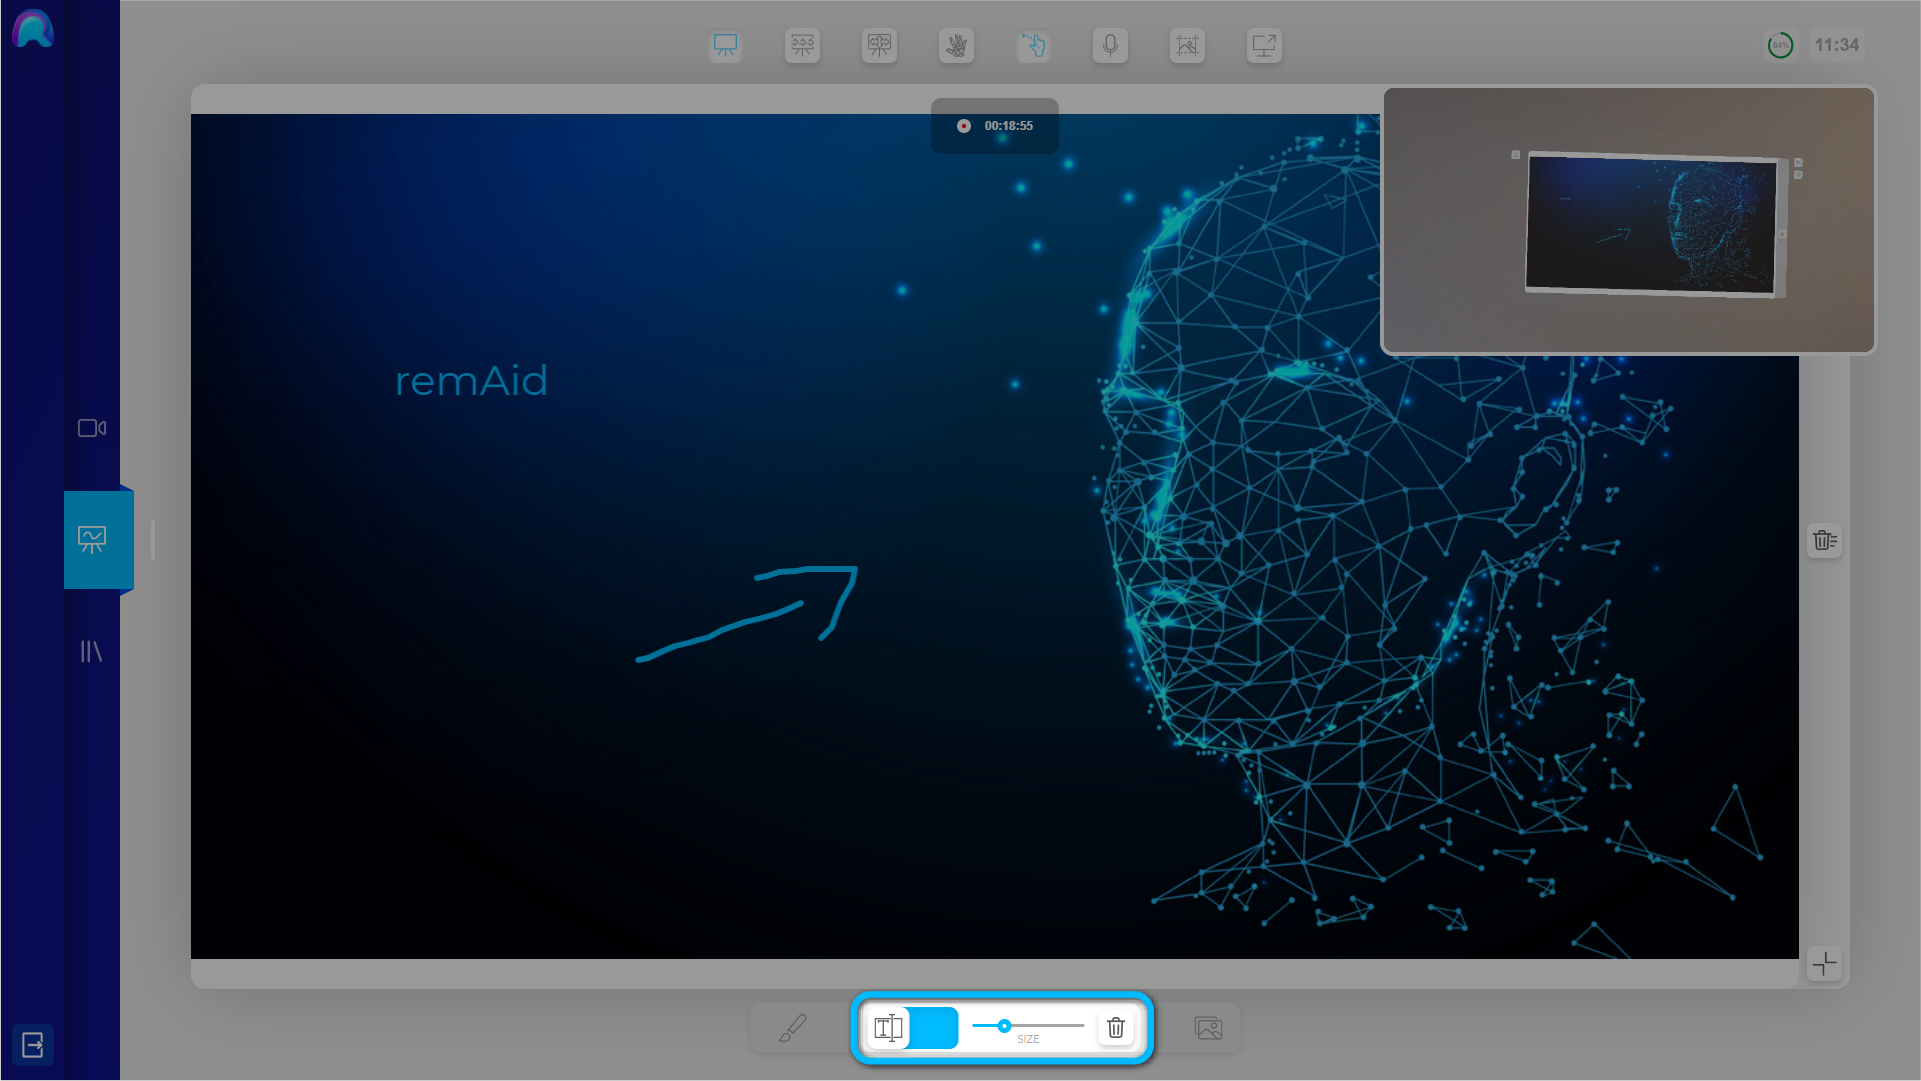
You can adjust the Text Tool as followed:
-
With the Size Slider you can change the size of the written text.
-
To completely delete all text elements press the Delete Button.
-
You can also just undo your last text field by pressing "Ctrl + Z".
-
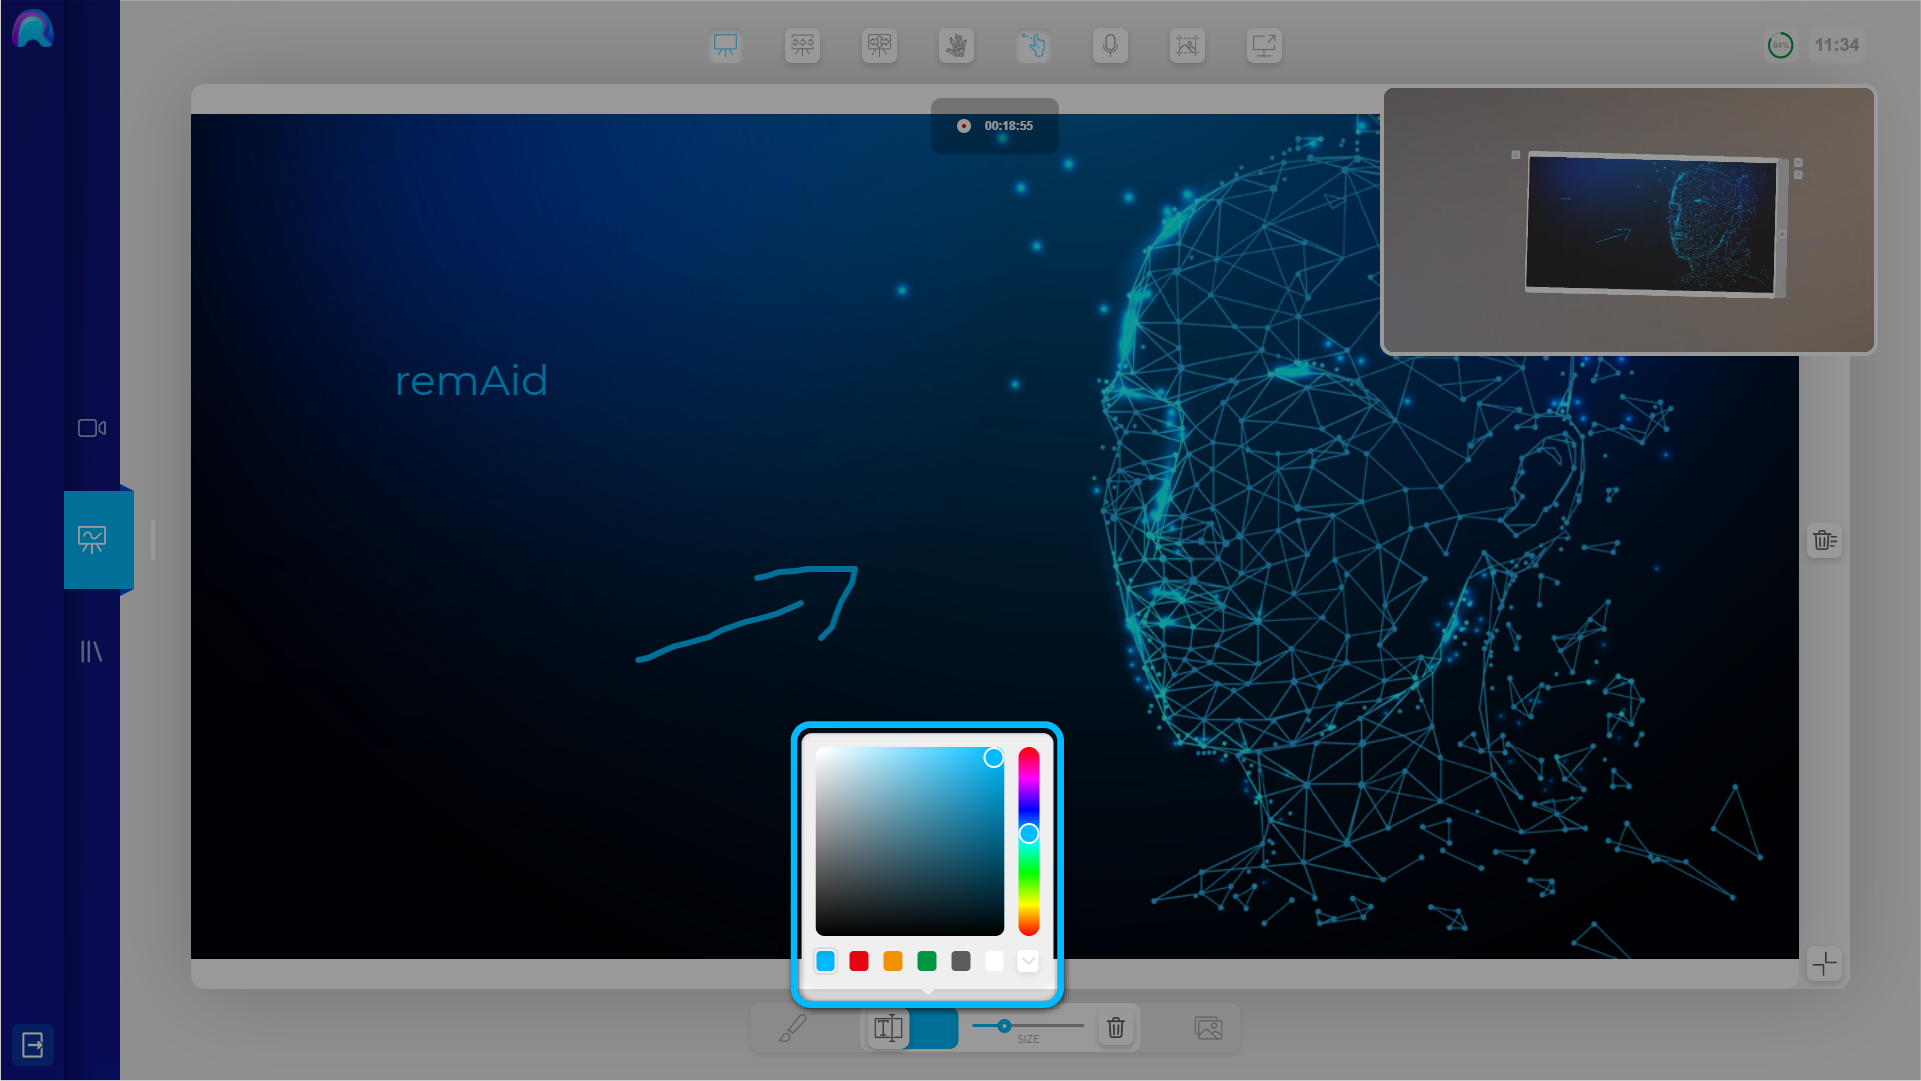
You can change the color of your text, by clicking on the color field and selecting the color you would like to use. In case you want to choose a different color than the six predefined ones, click on the little arrow right next to the colors. Then choose your color from the color picker field. The color that you choose will be automatically added to the predifined color fields.
Spectator Positioning of the Whiteboard
The Operator is able to position the Whiteboard wherever he wants. To find out how to do this, please check out our HoloLens Virtual Whiteboard Guide.
However, this might not be possible in some cases, e.g. when the Operator is occupied and doesn’t have his hands free to move the Whiteboard himself. That’s why remAid also gives the Spectator the capability to remotely move the Virtual Whiteboard.
If the Virtual Whiteboard is already enabled, you are ready to adjust the placement of the Virtual Whiteboard in the Operators view. If the Whiteboard is not activated, you first have to enable the Whiteboard.
Next you have to select the Whiteboard Manipulation Tool in the Main Menu Bar at the upper Menu Bar of the screen.
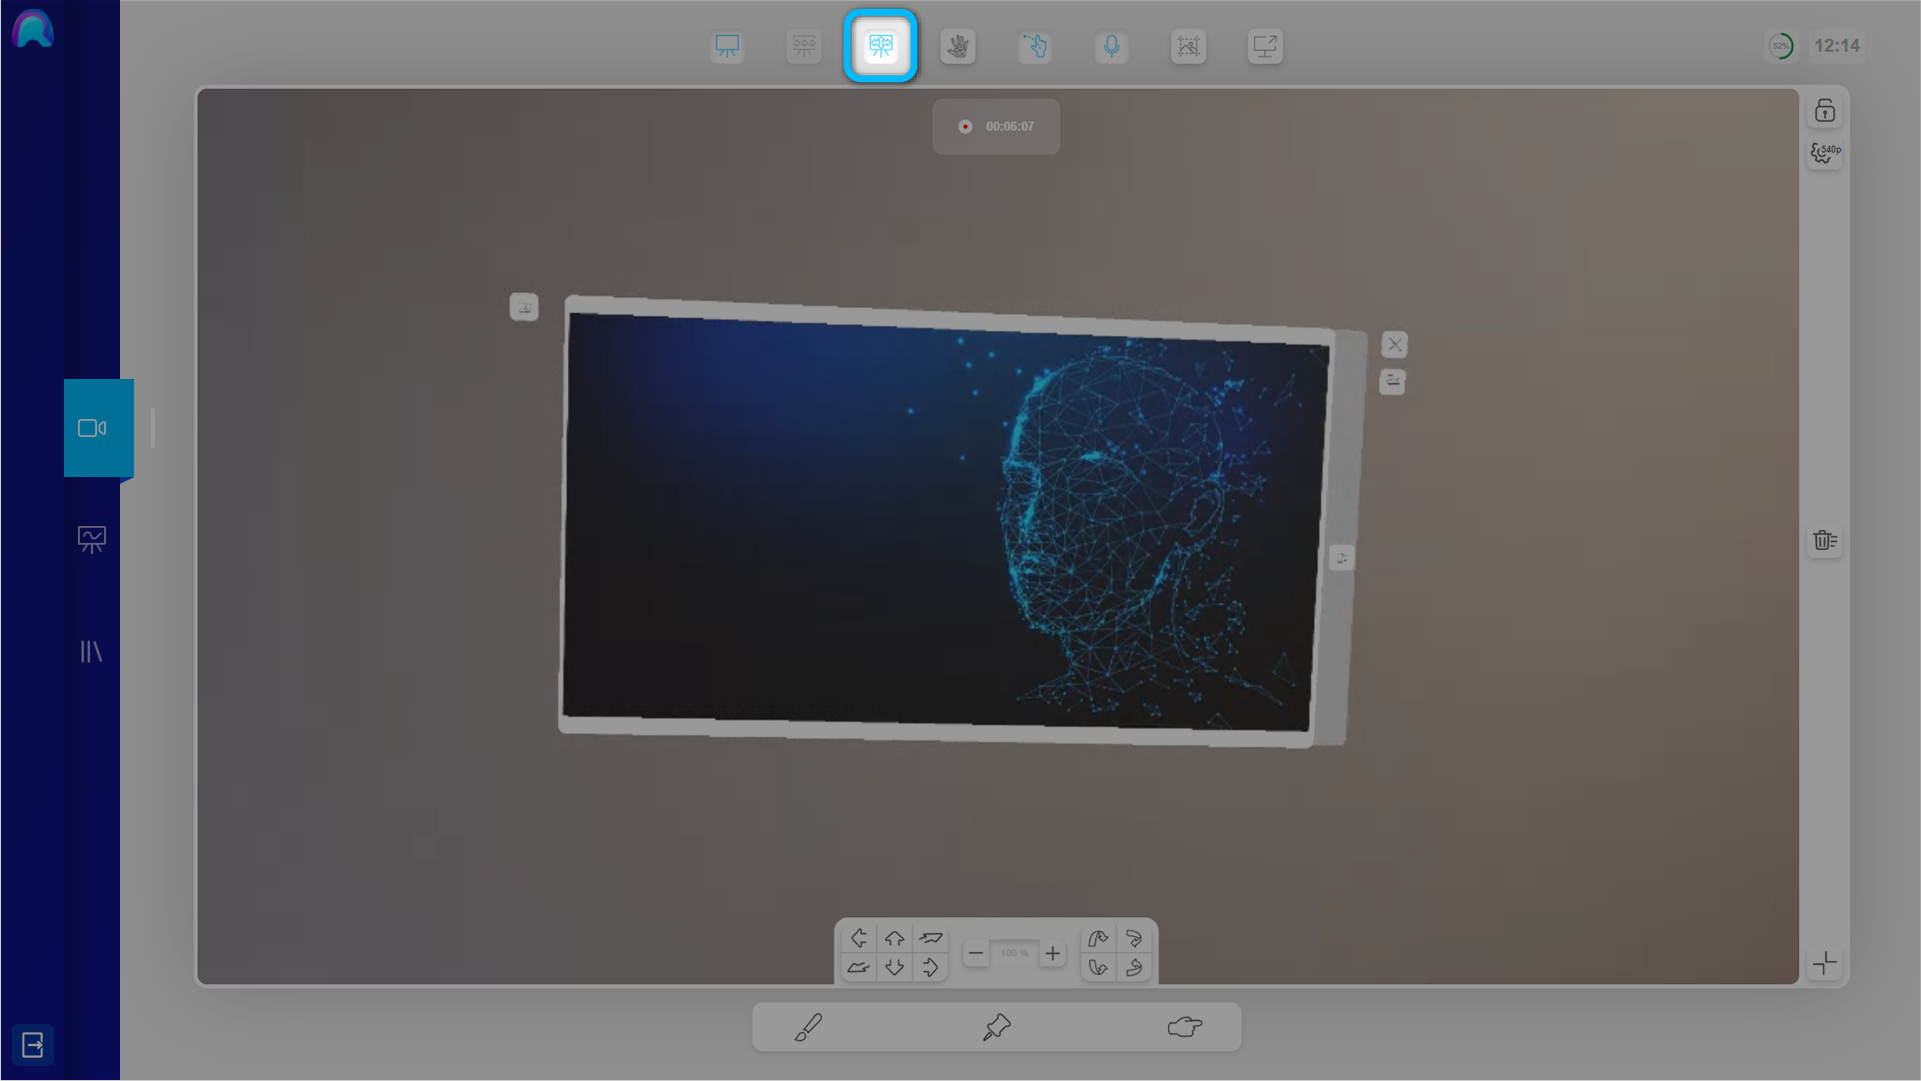
At the bottom centre of the screen you should now see the Whiteboard Manipulation Panel:

-
Move Left
-
Move Up
-
Move Backwards
-
Move Forward
-
Move Down
-
Move Right
-
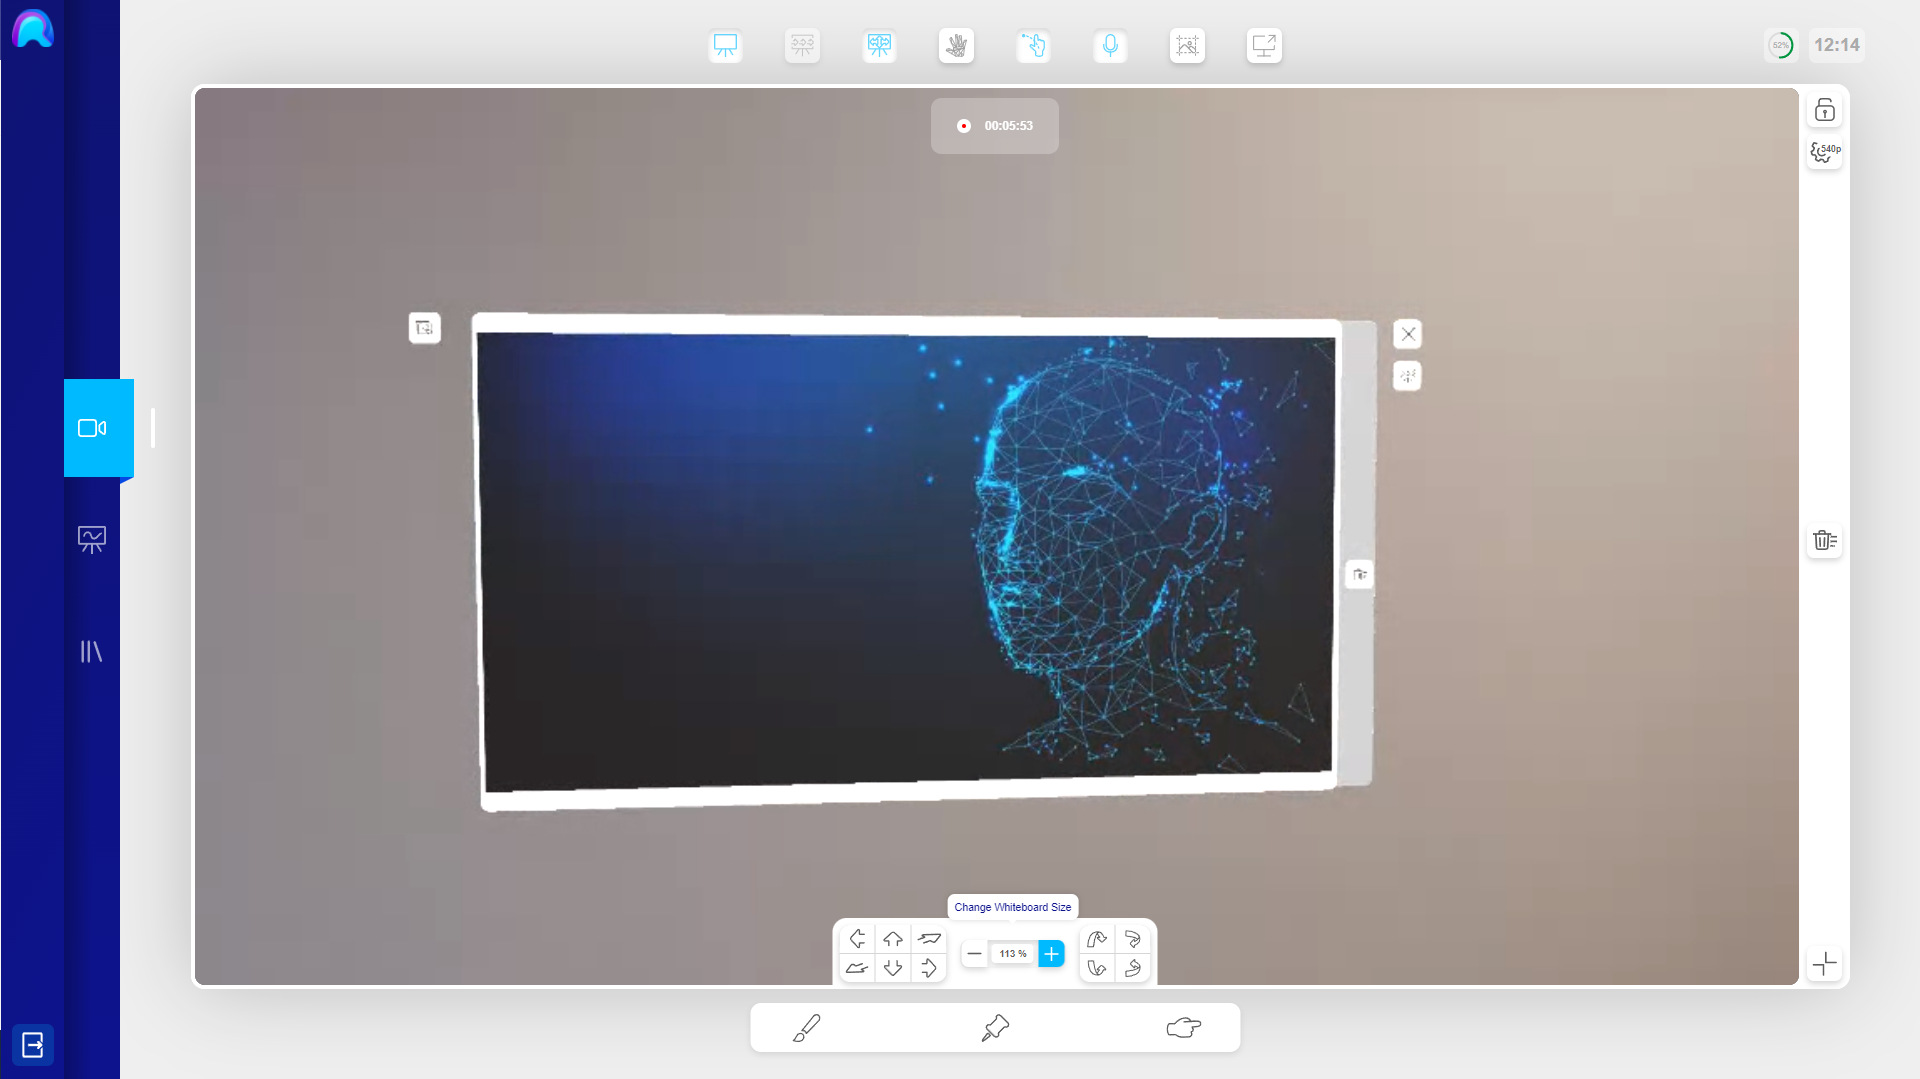
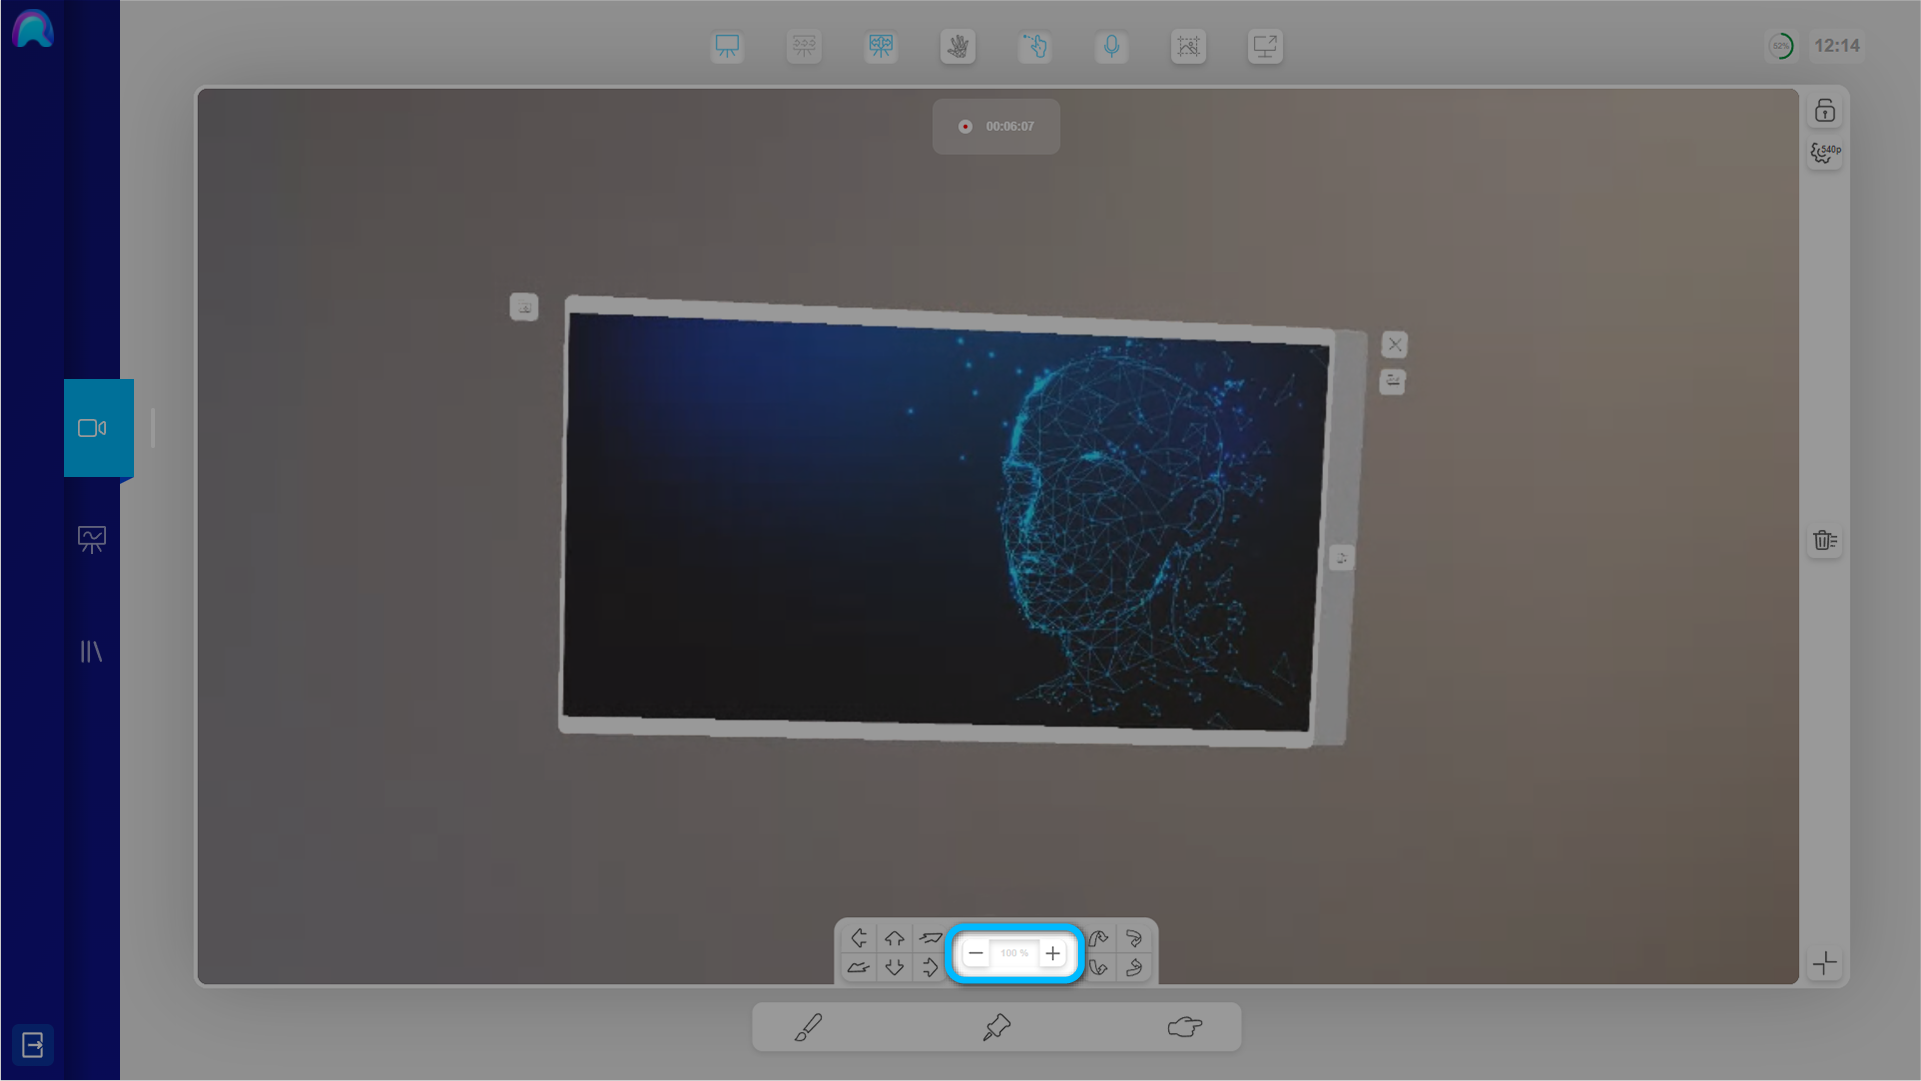
Change Whiteboard Size: You can change the size of the Whiteboard, by clicking on "+" and "-".
-
Tilt Backwards
-
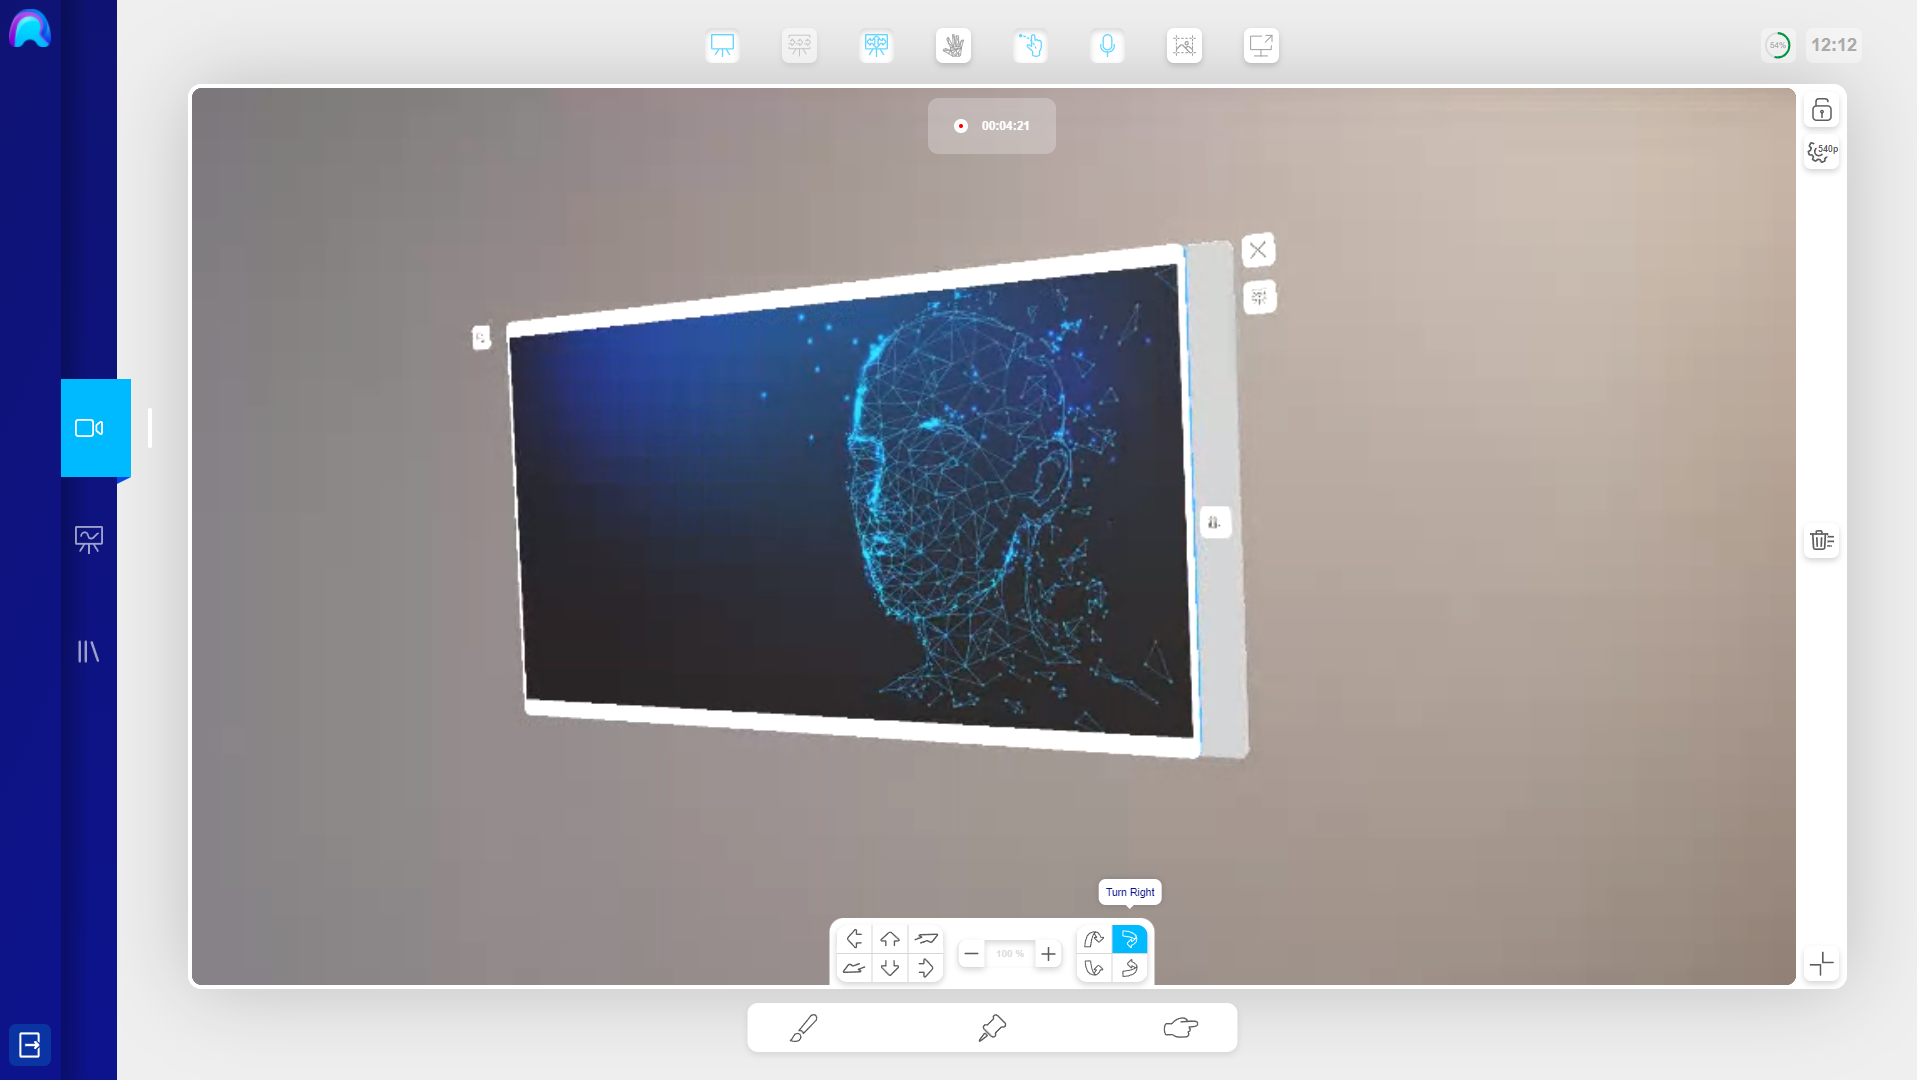
Turn Right
-
Tilt Forward
-
Turn Left
When you click on one of the buttons, the Whiteboard moves in relation to its current position and rotation. The request to move the Whiteboard is sent to the HoloLens immediately.
You can for instance:
Turn the Whiteboard horizontally right and left.
You can make the Whiteboard bigger and smaller, by clicking on the '+' and '-' buttons.
To rescale the Whiteboard to it's original size, just click on the percentage field and the Whiteboard will rescale to its original 100% size.
Making the Virtual Whiteboard follow the Operator
In case the Operator is moving around a lot, but he still wants to always be able to see the Whiteboard, you can activate the Follow Me mode. Then the Whiteboard will follow the Operator around. Simply click on the ‘Whiteboard Follow’ button in the Top Menu Bar at the top of the screen.
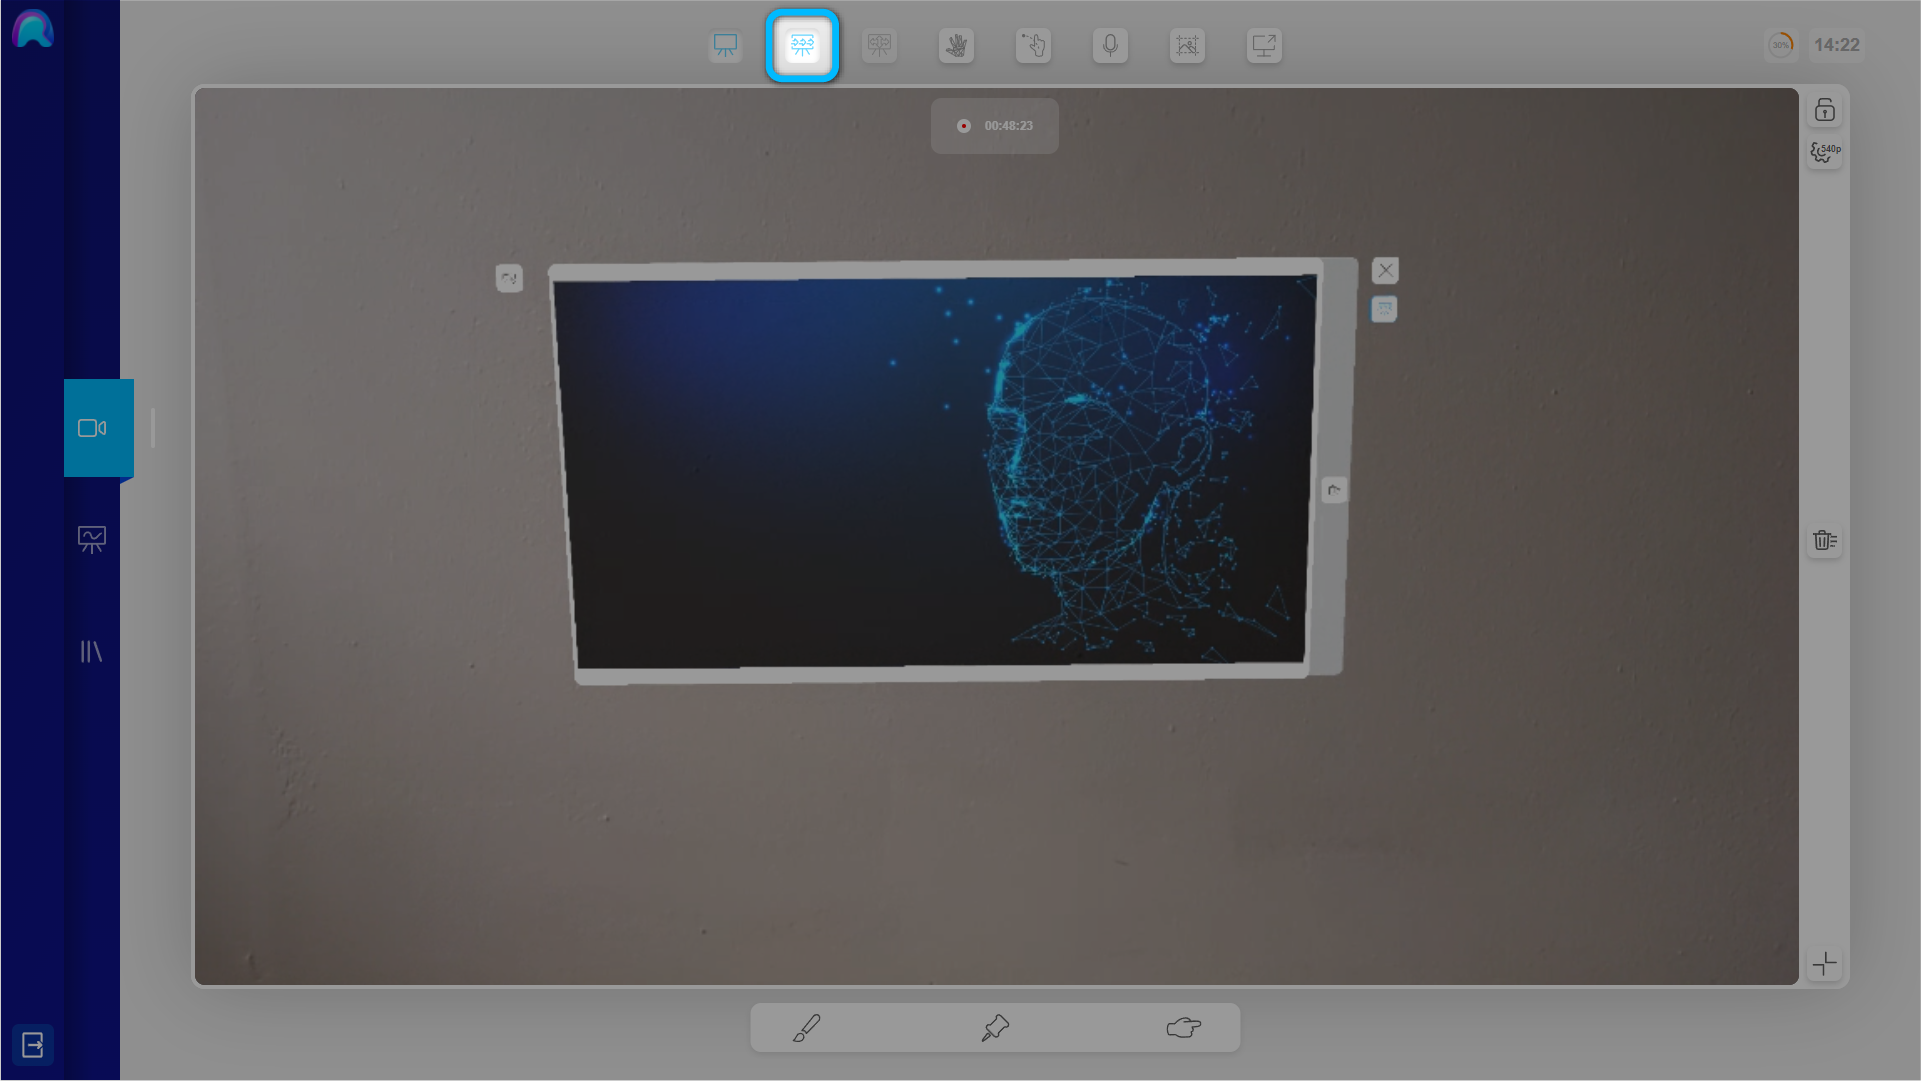
To disable the Follow-Me mode, click on the ‘Whiteboard Follow’ button again.
To find out more about how the ‘Follow Me’ mode works please check out our HoloLens Virtual Whiteboard Guide.
